
My son's Father's Day gift
I think you know by now that I’m a grandma!
What an amazing experience it has been—100% worth all of the evidence of my age!

But, guess what else?
My son is a father!
How did this happen?
I promise I had that talk with him many times—ha!
What I want to share today is the crazy full circle JOY of watching my first child welcome his first child into the world AND how I chose to celebrate his first Father’s Day.
I bet you can guess?
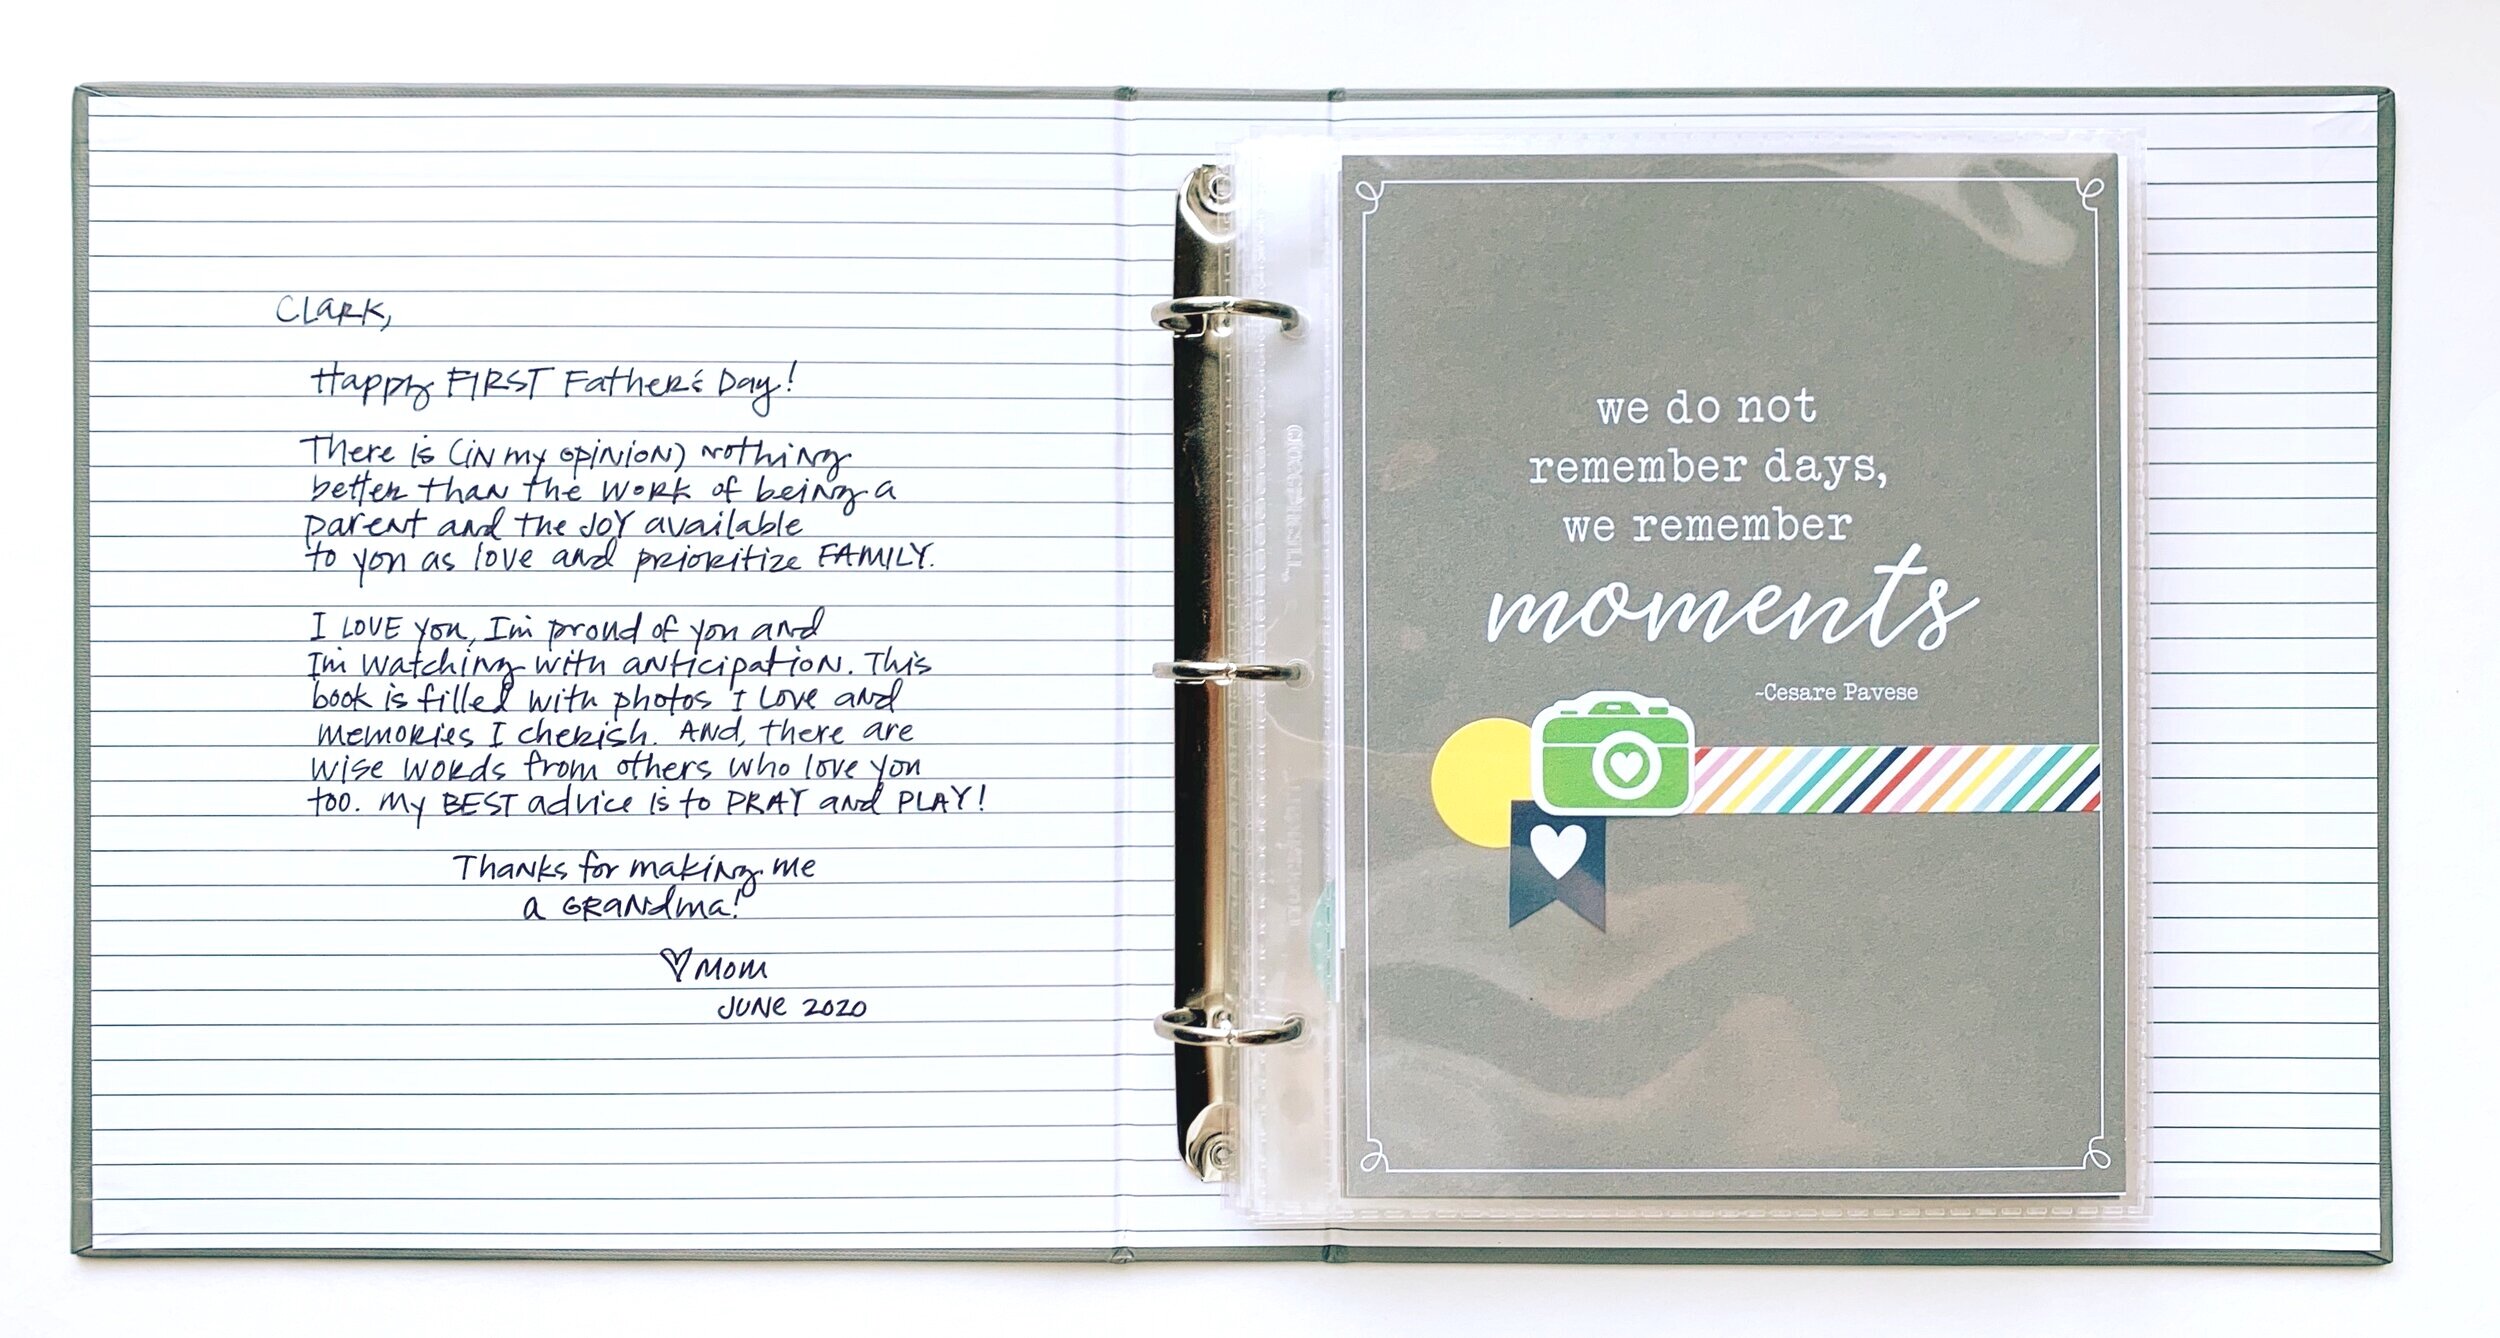
I made him a … SCRAPBOOK!
No. Really?
Yes. Really!
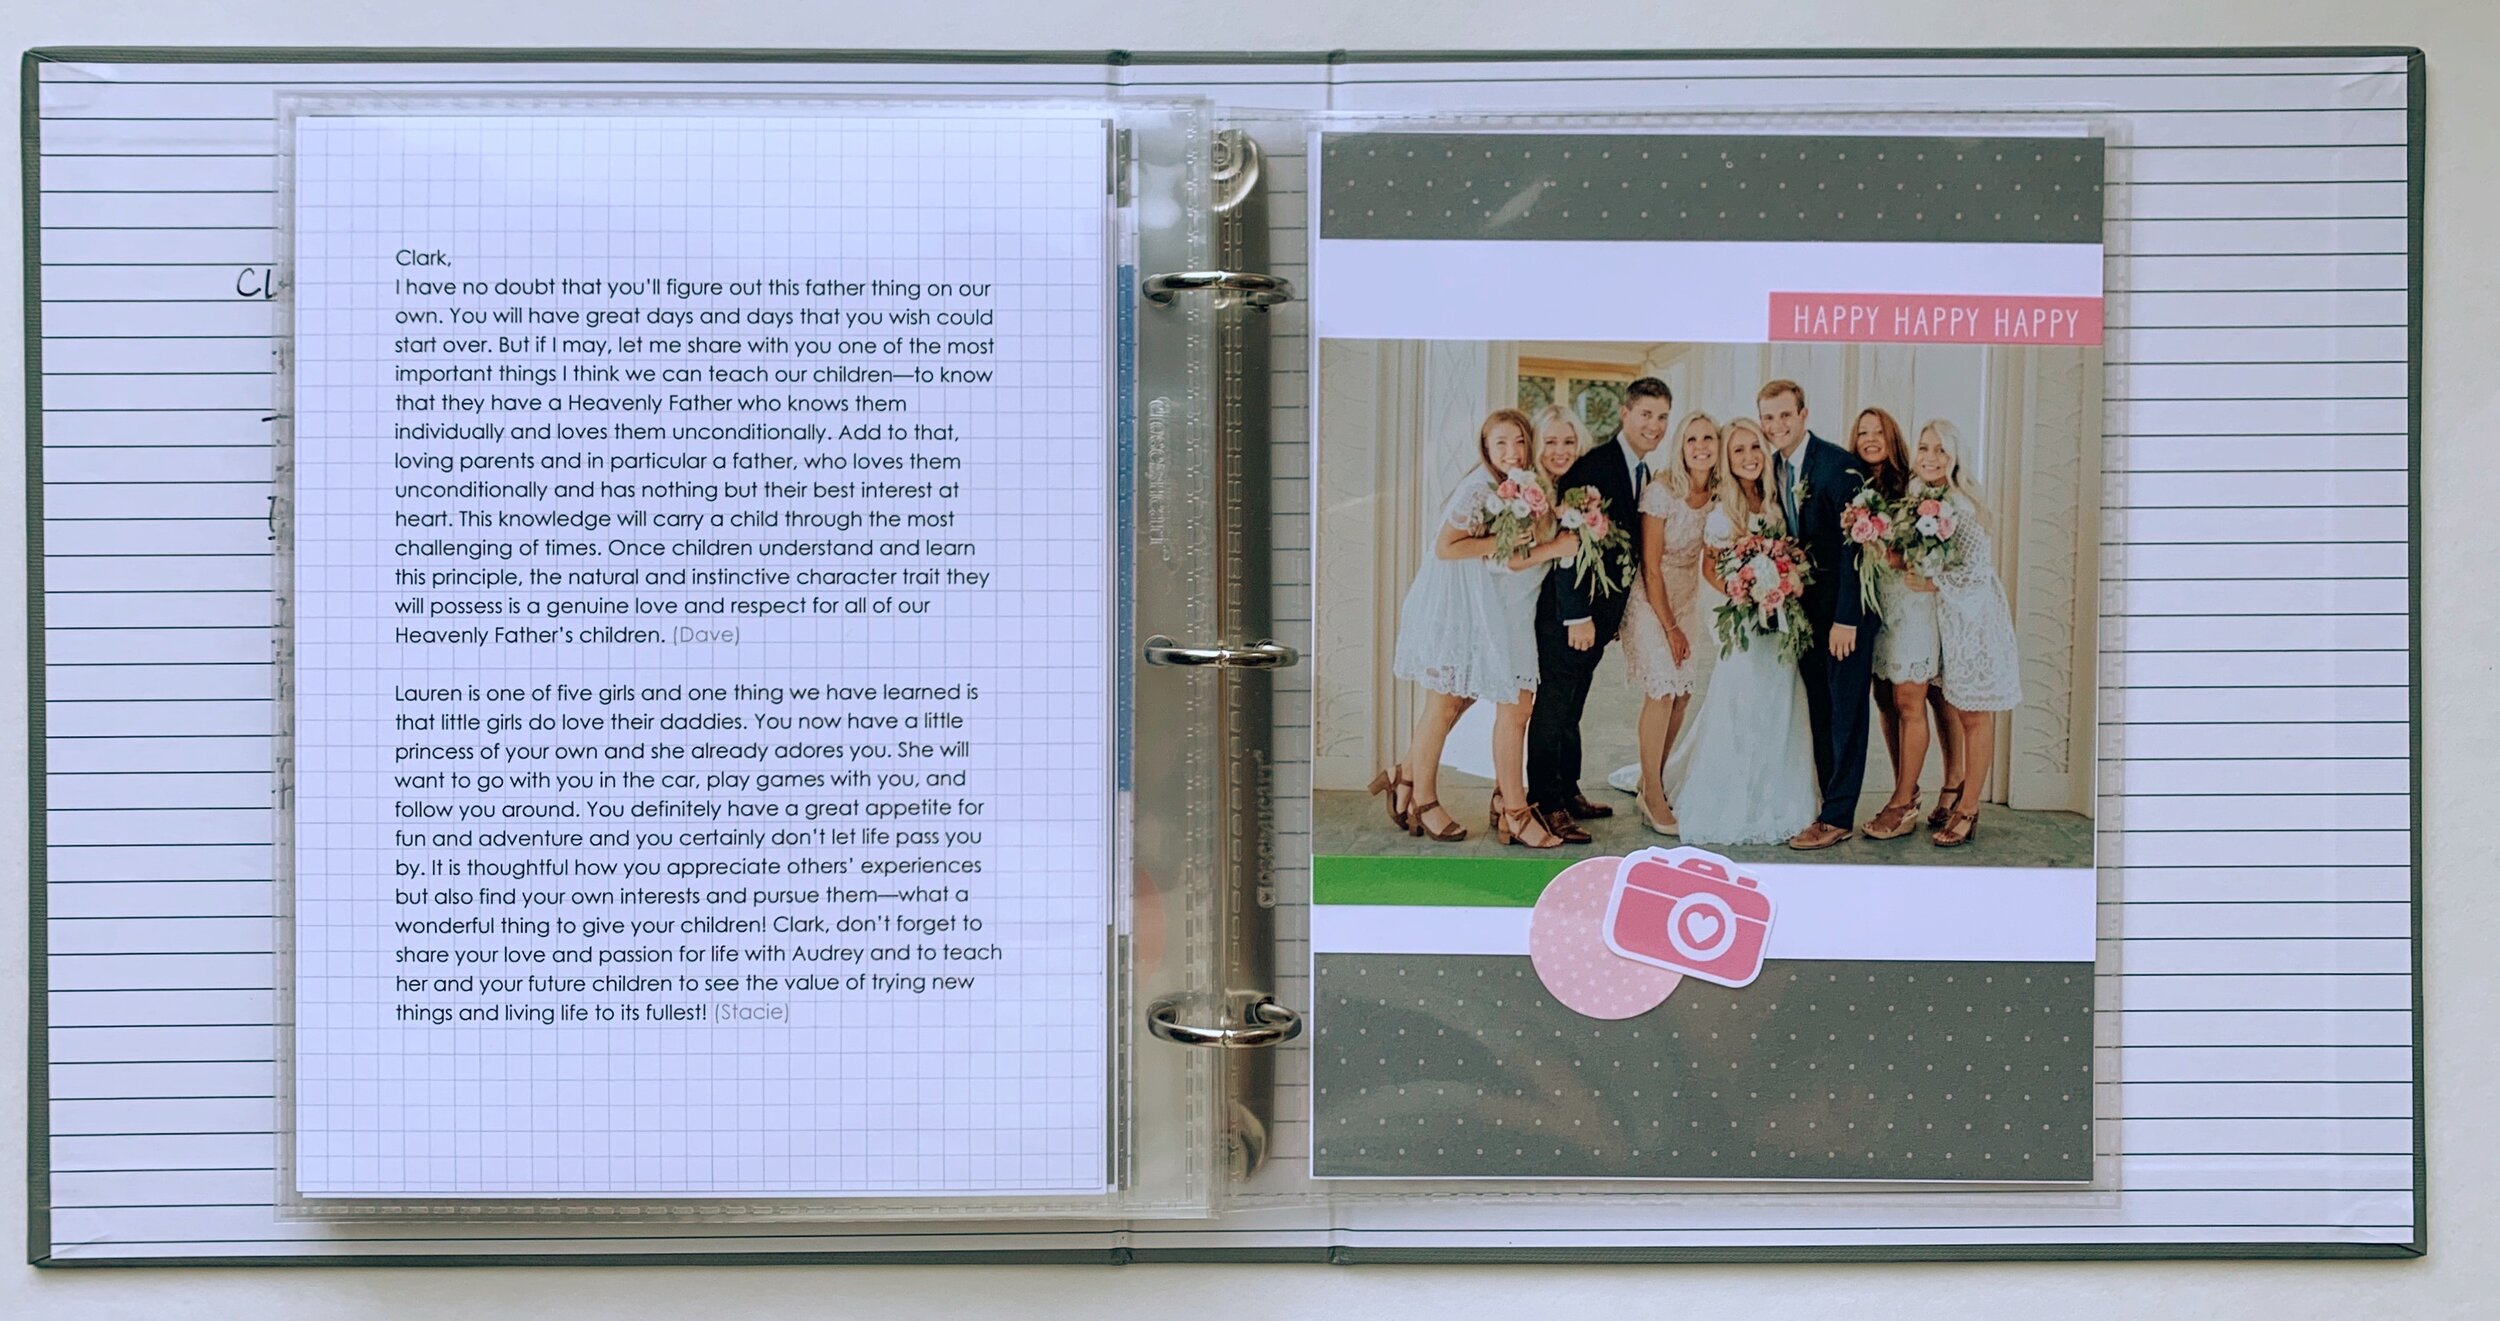
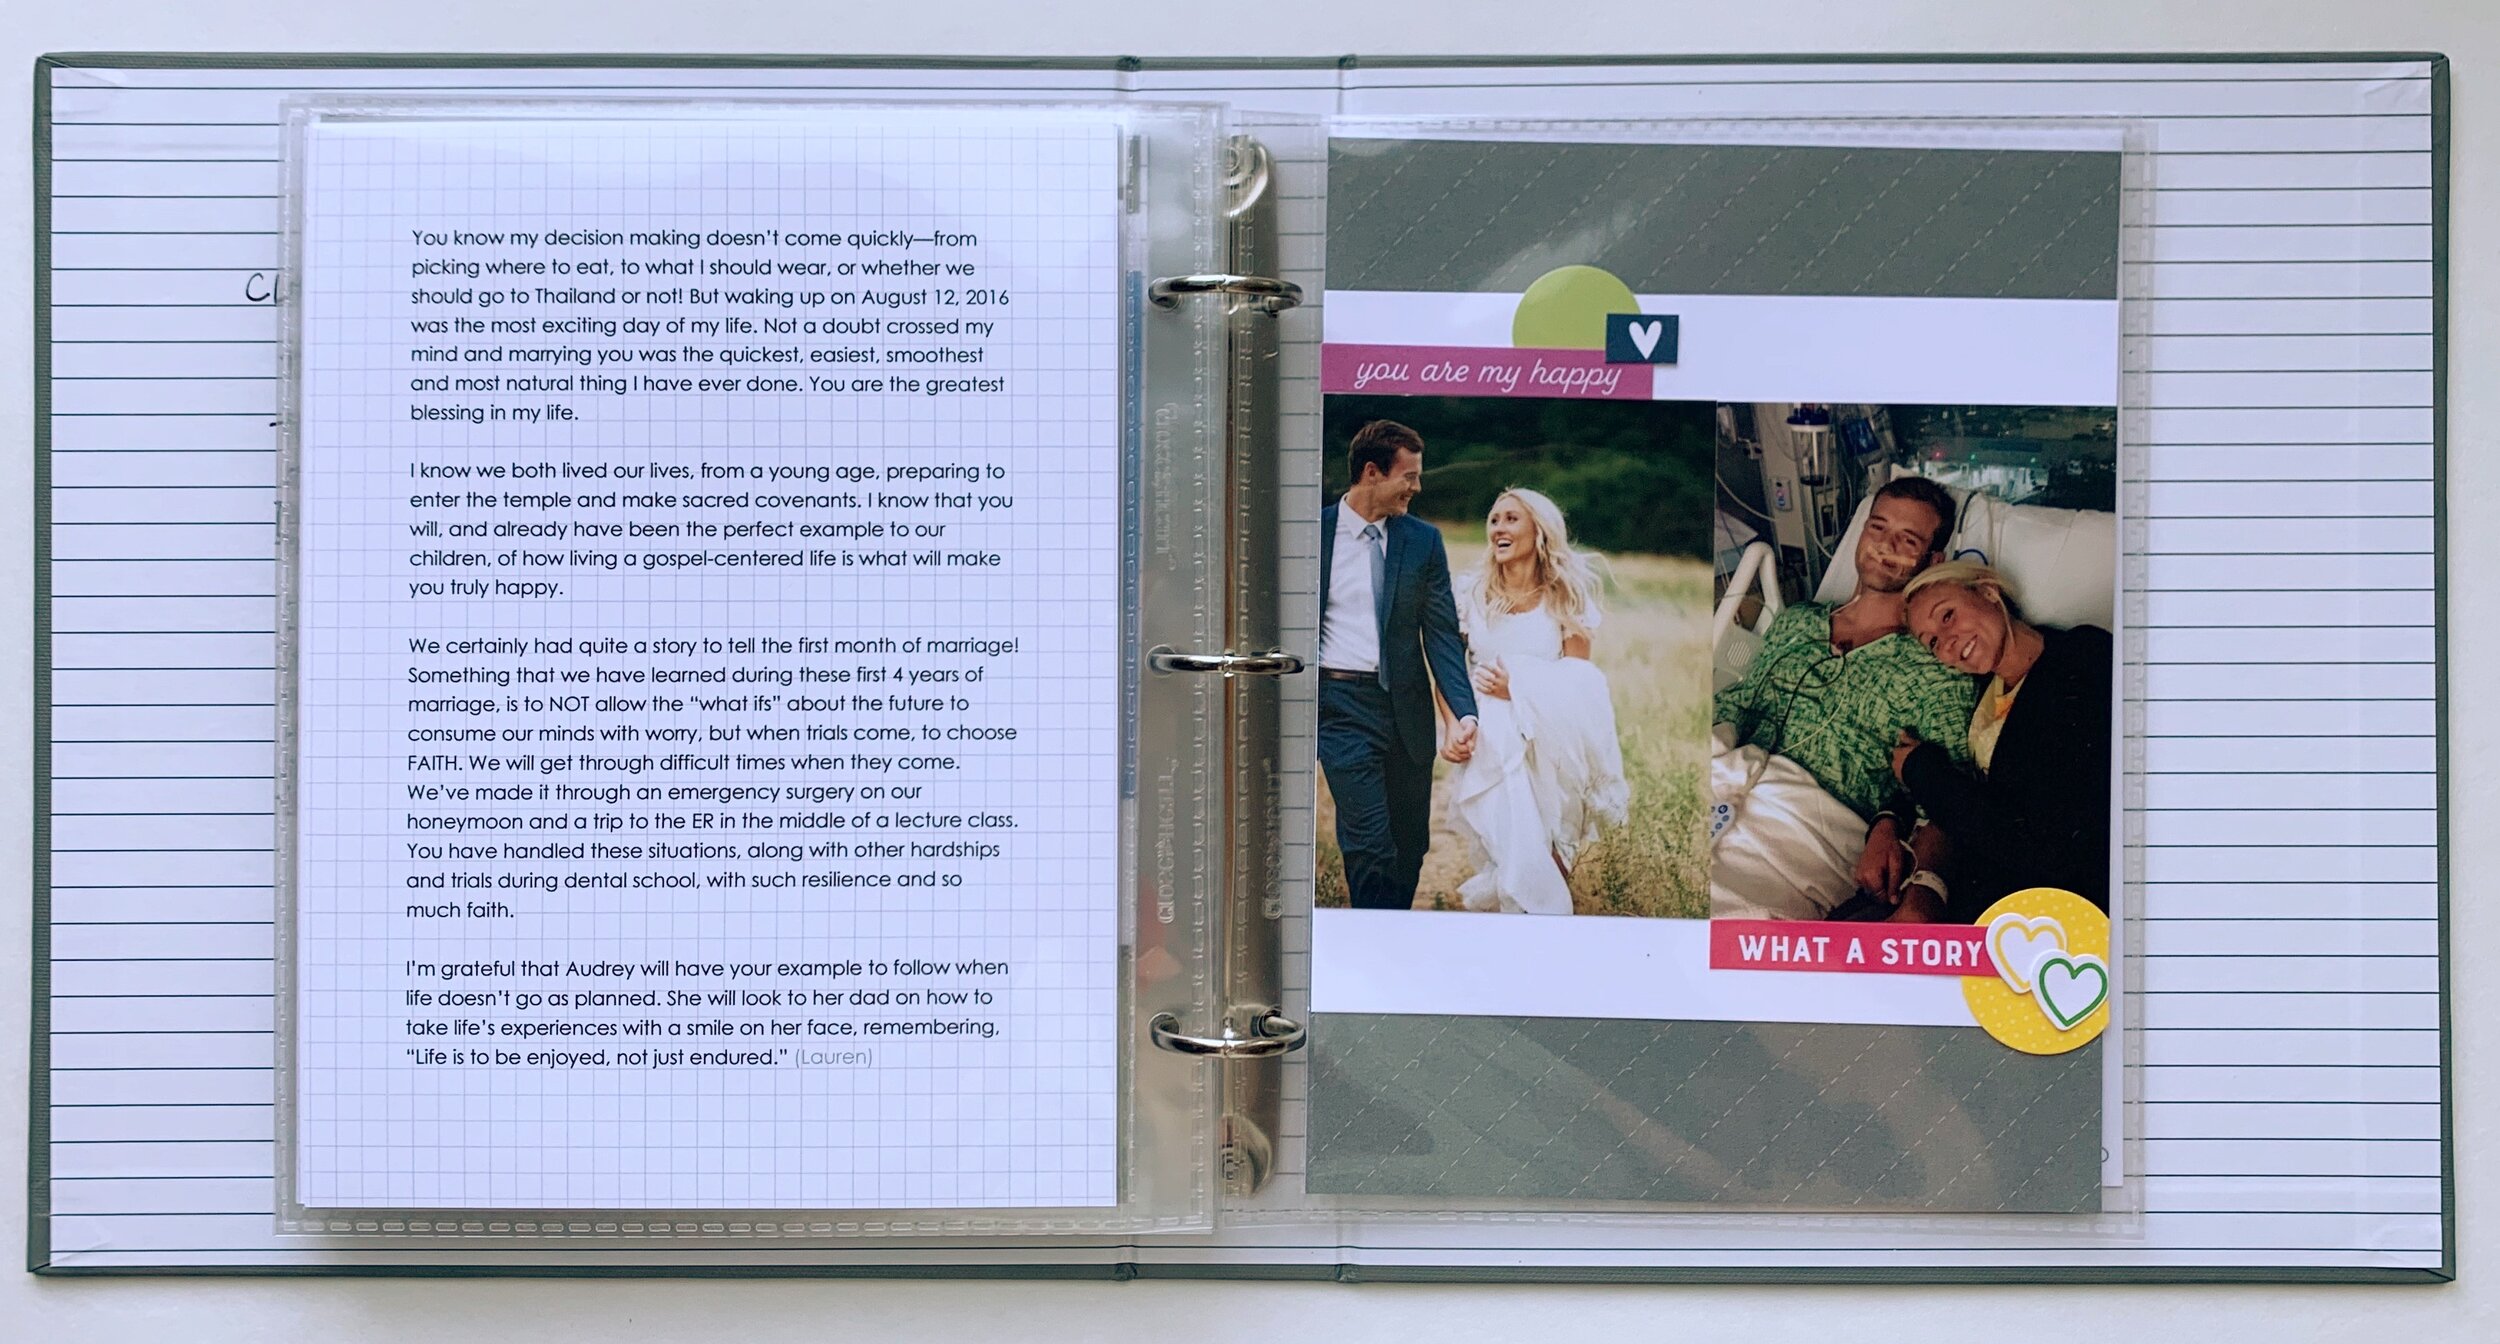
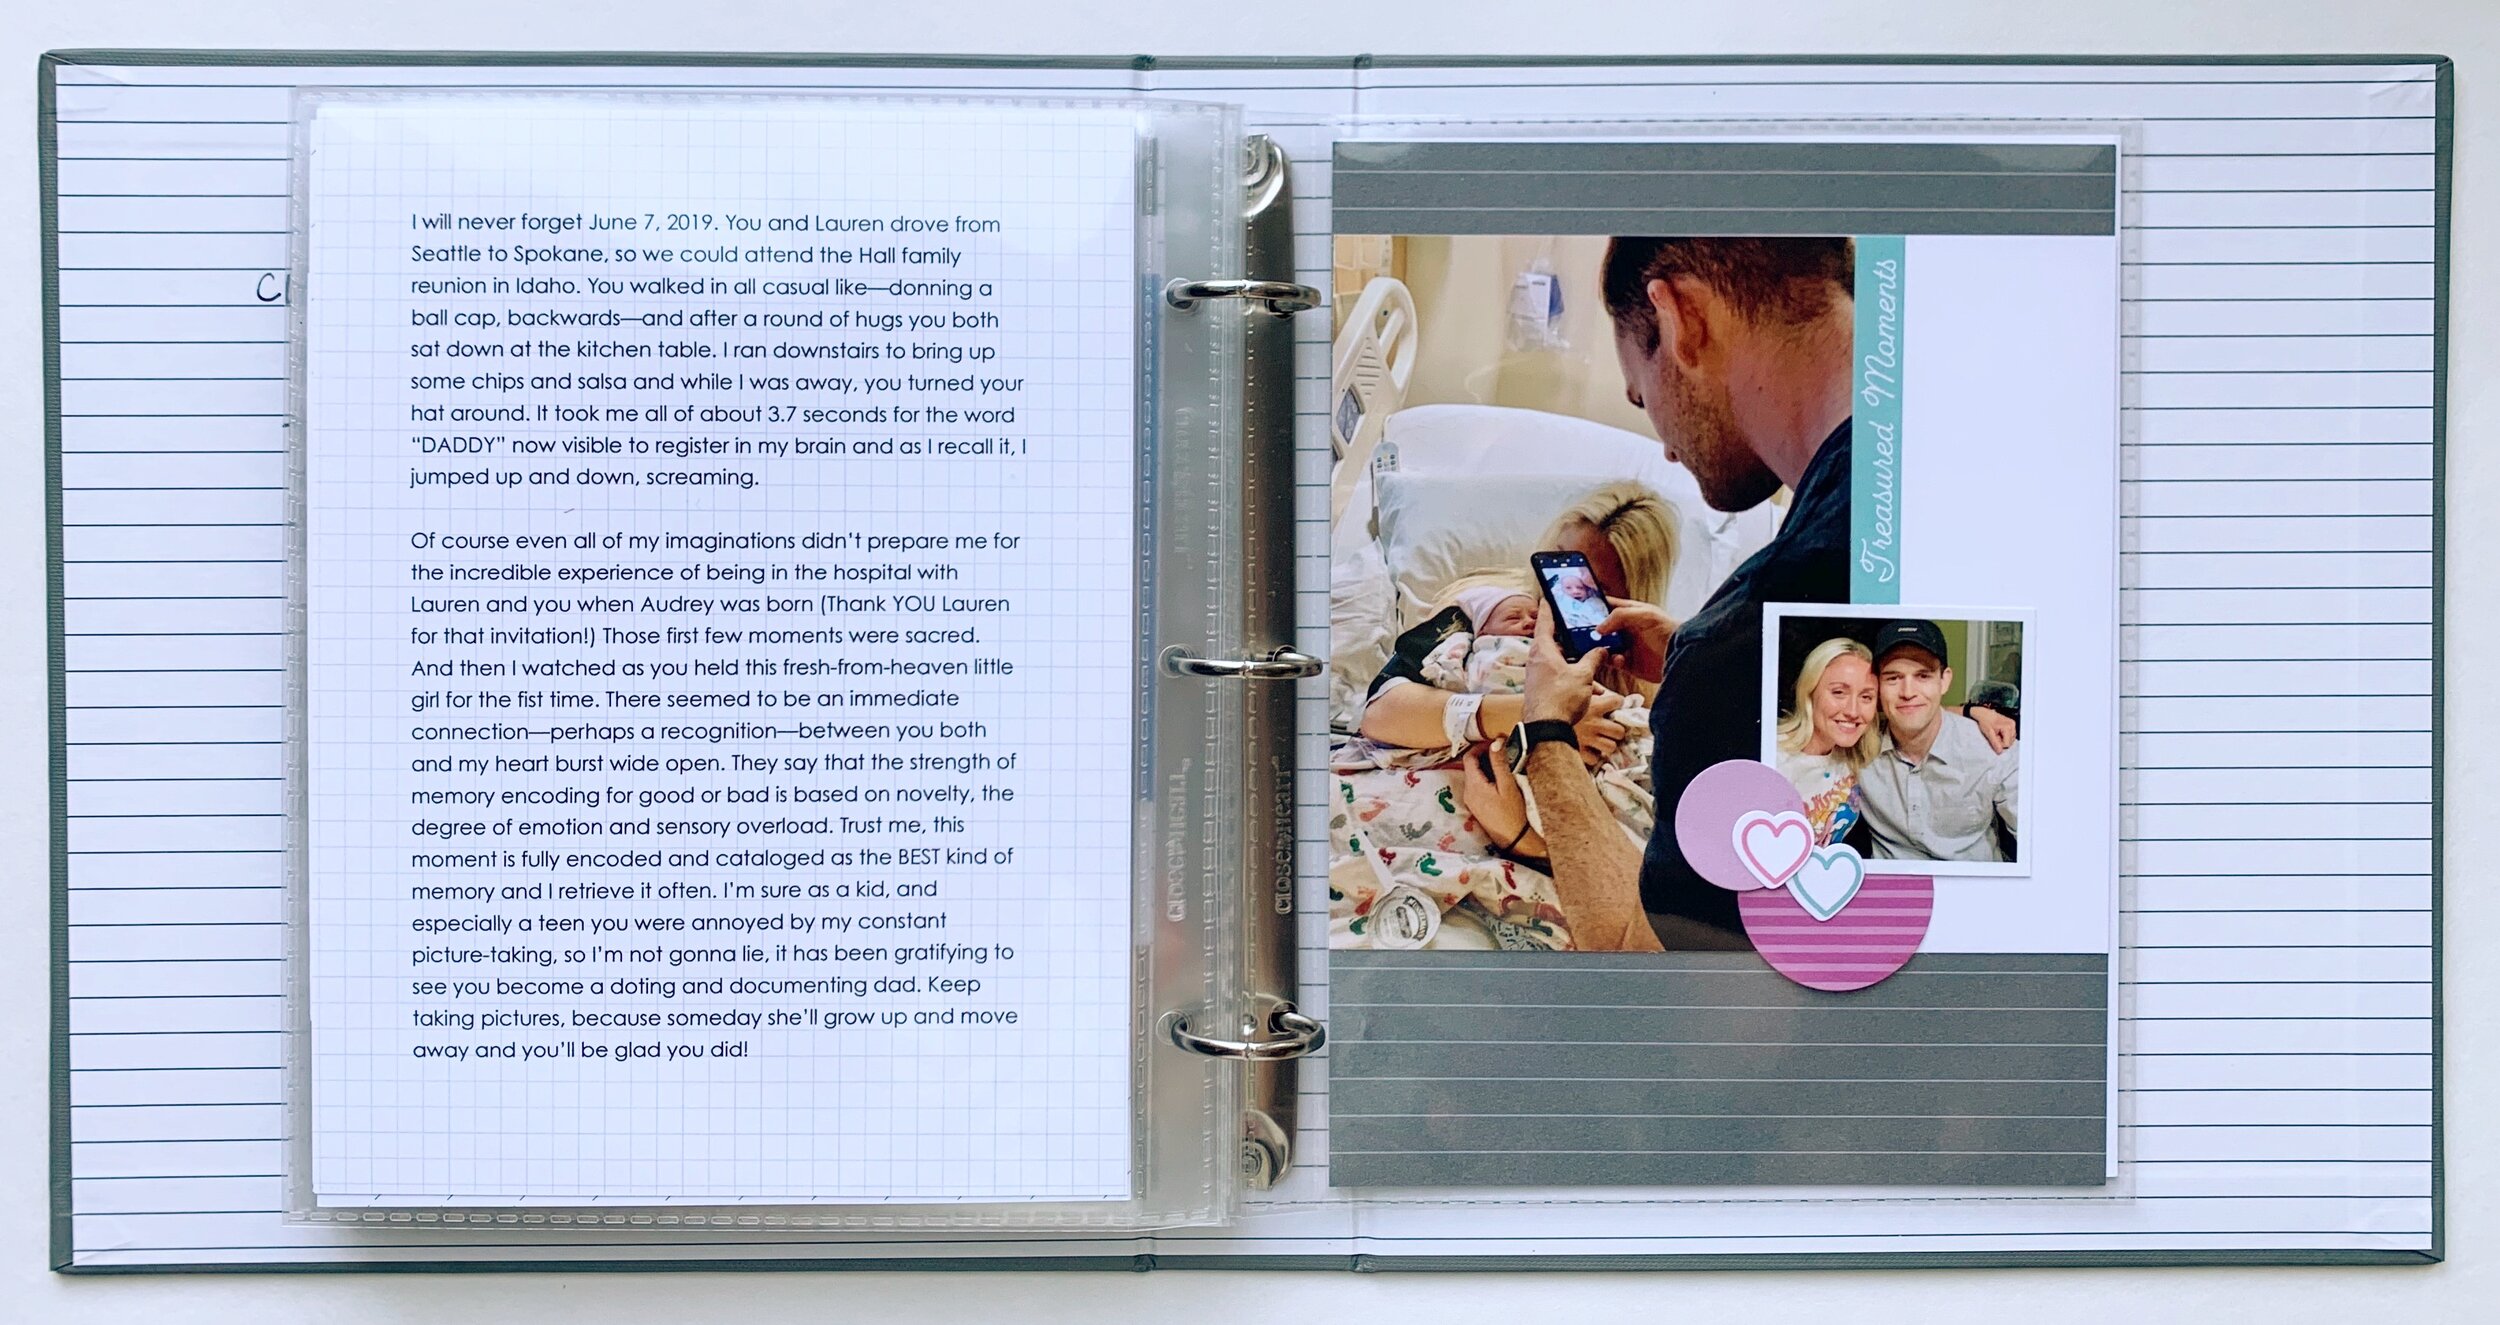
But not just any scrapbook, a Stories I Love album, filled with a few of my favorite photos and/or moments paired with memories—my words and the words of others— in the form of thoughts, advice, and wisdom.
Here, I’ll show you …
So, in the off chance that you don’t know, Stories I Love, formerly known as Pictures I Love (in my first book) and Photos I Love (in subsequent books and classes) is probably my most favorite concept ever simply because it is and always has been my answer to comments and questions like these …
“But I’m not creative, I could never scrapbook”
”Nothing is organized and I’m so overwhelmed!”
“But, how do I get started?”
OR , my favorite …
“I have one week, is there anyway I can compile a meaningful scrapbook for my ___________ (daughter, mother, sister … or any other person you love)? “
There is an answer.
Stories I Love ❤️
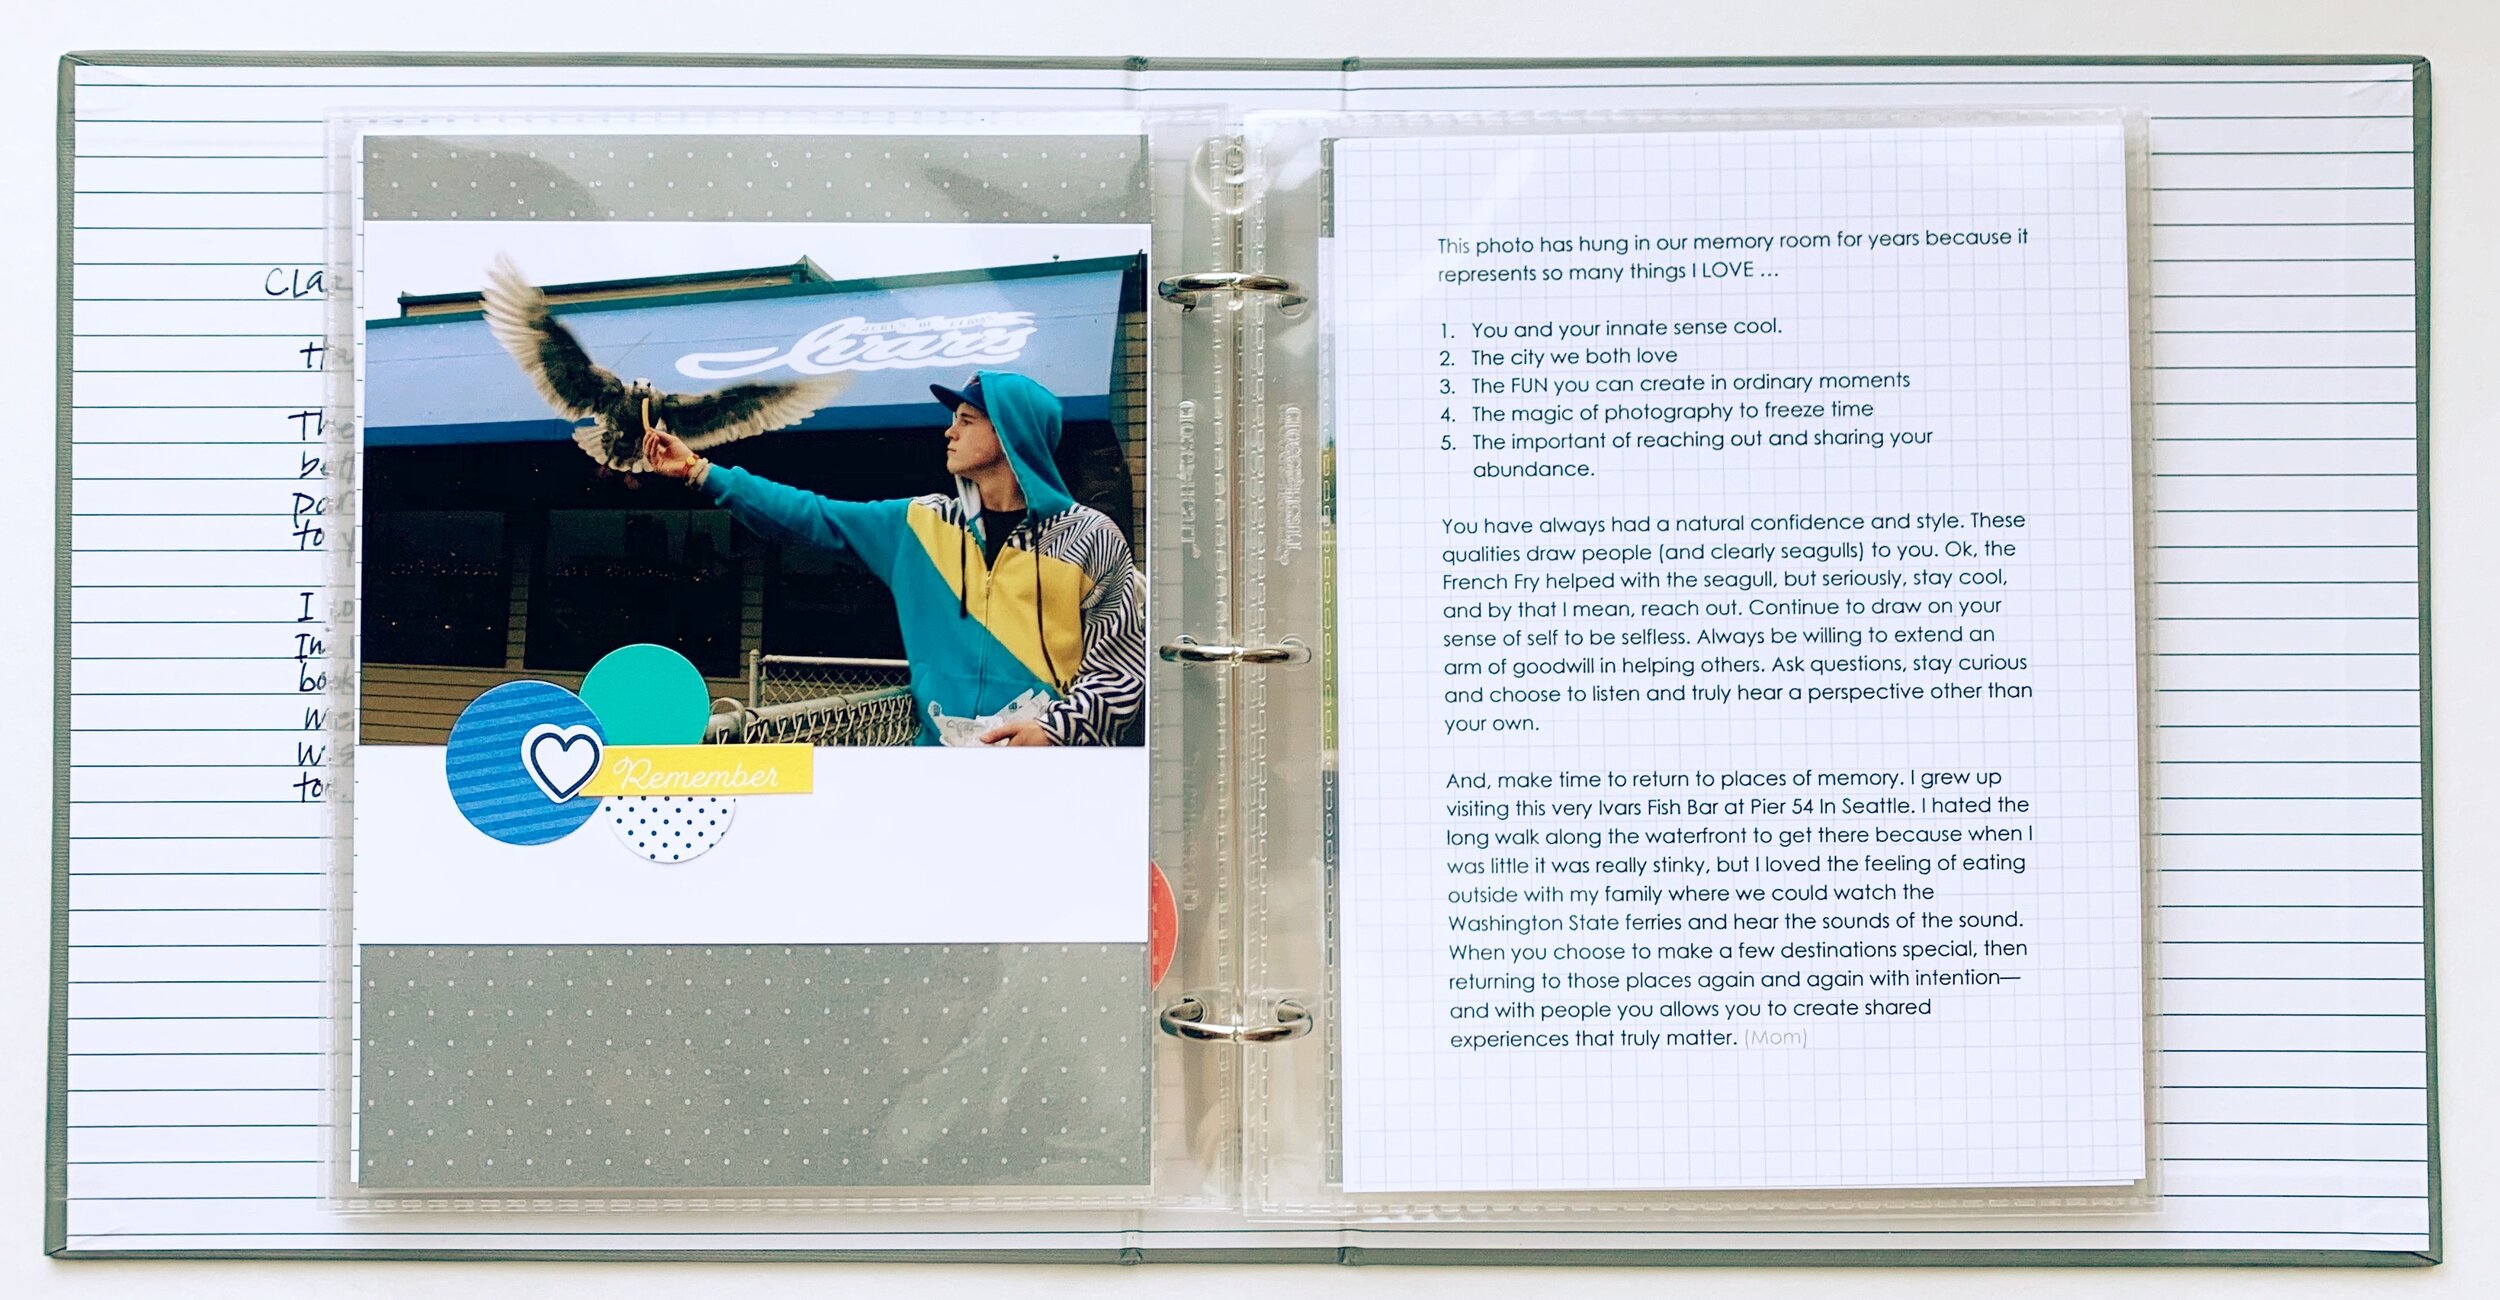
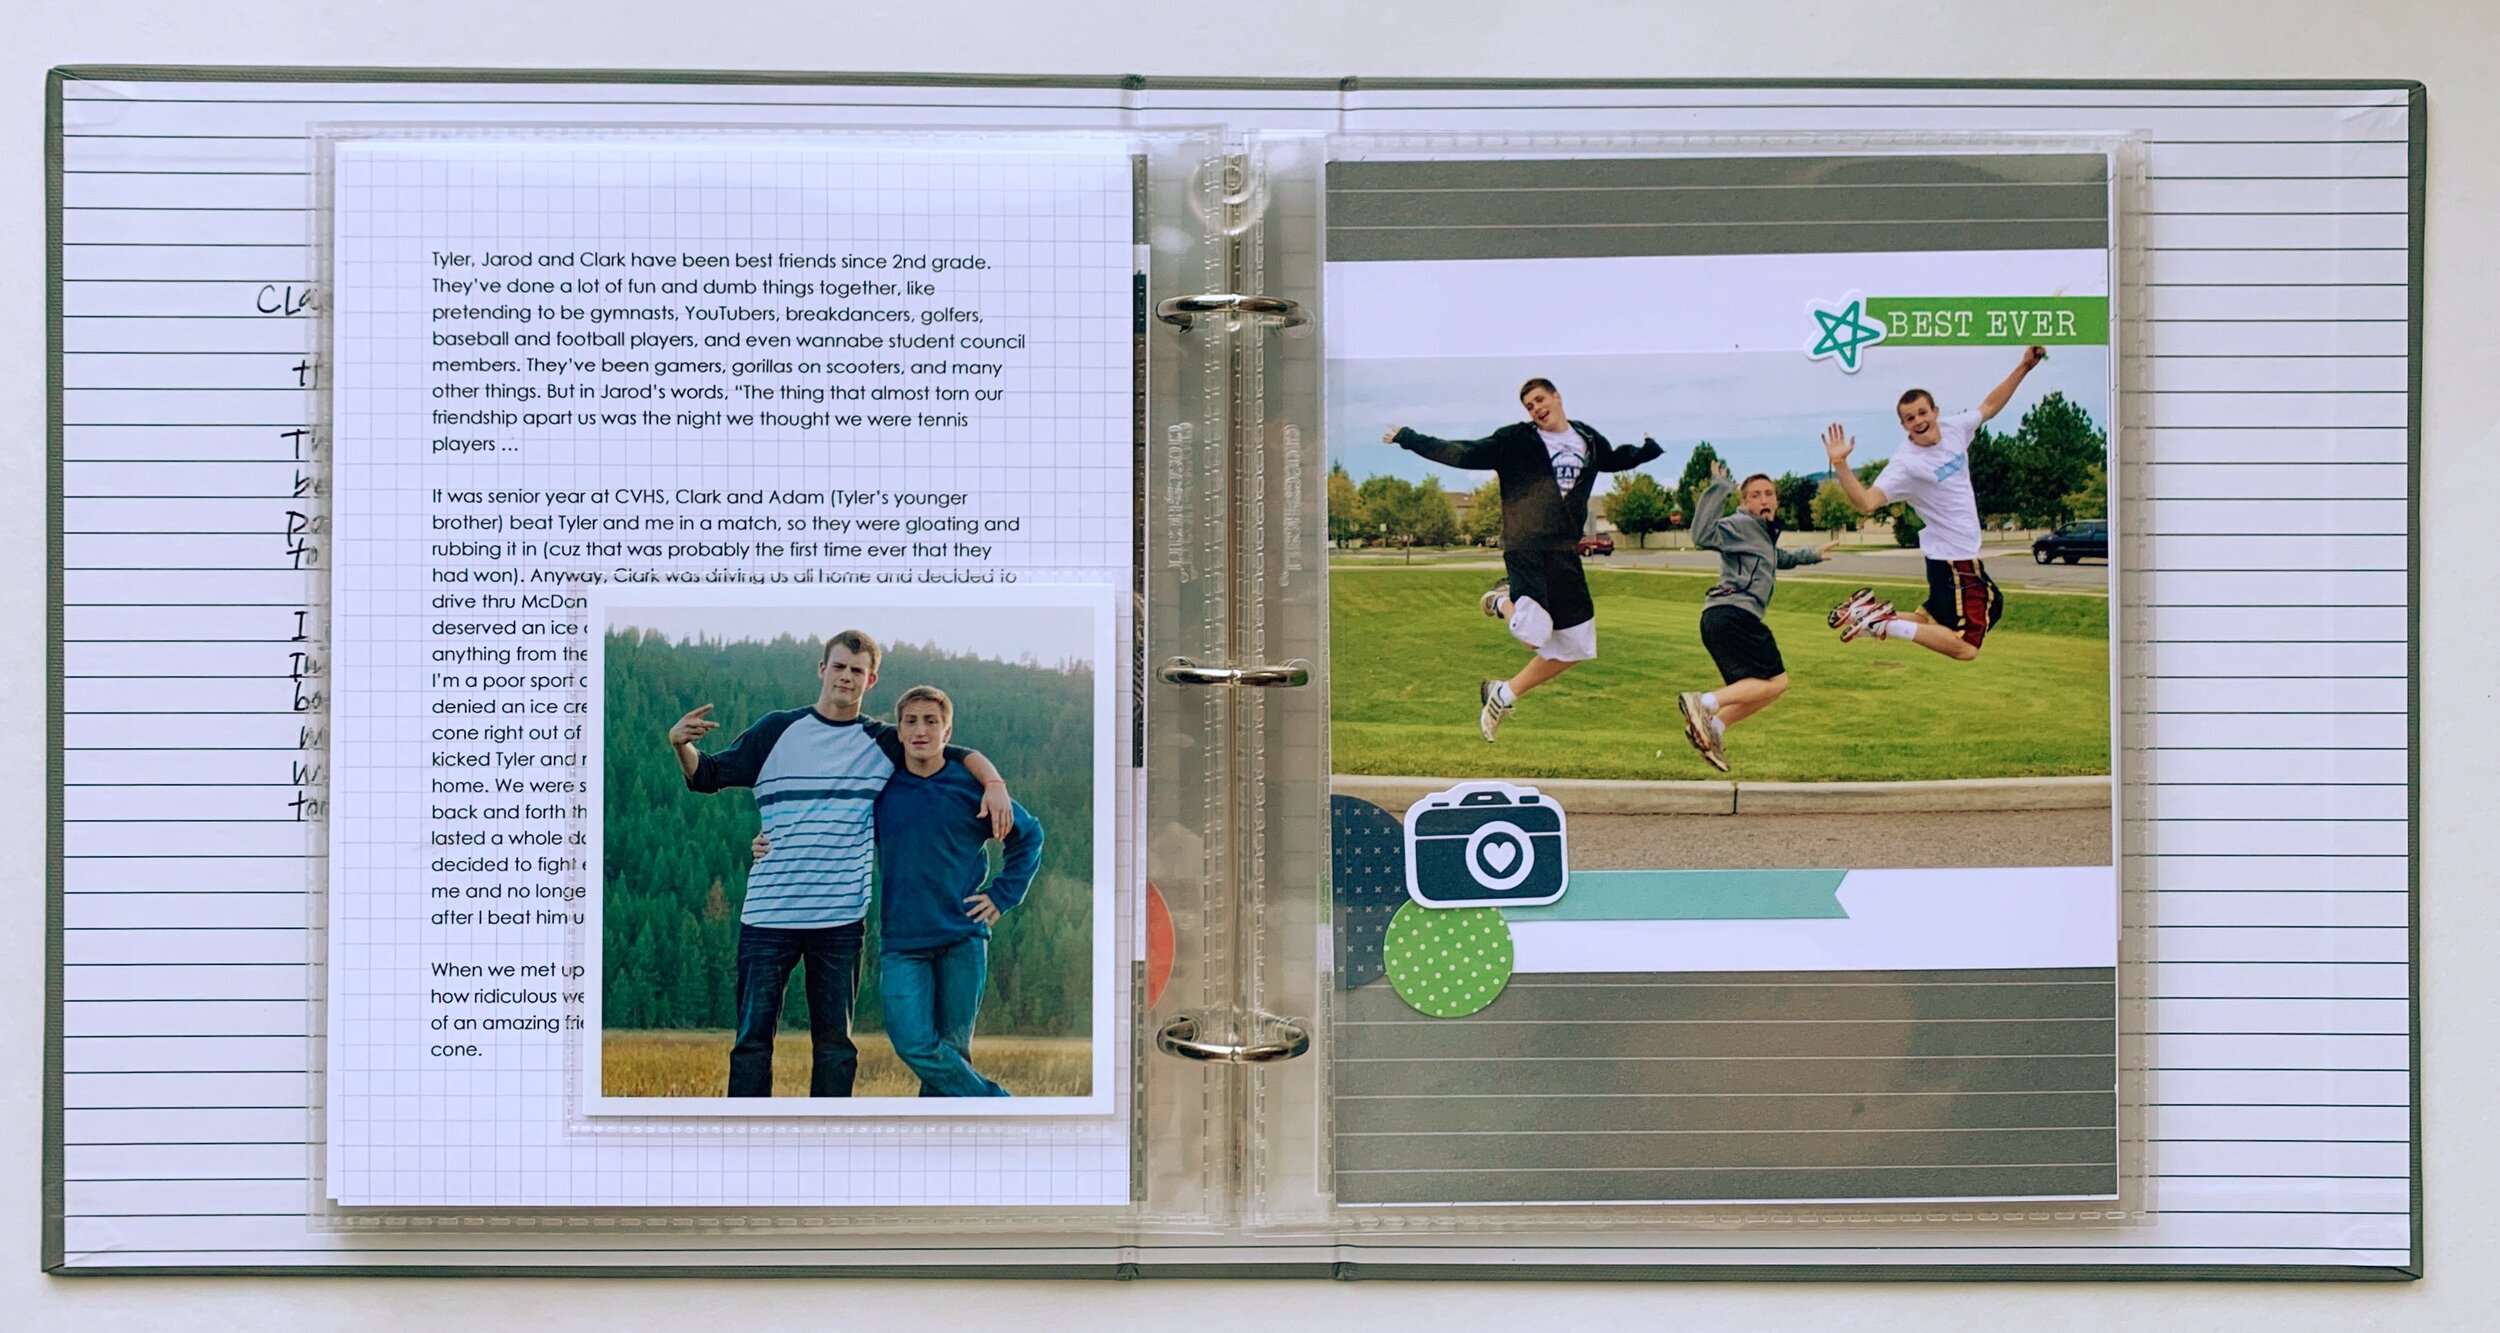
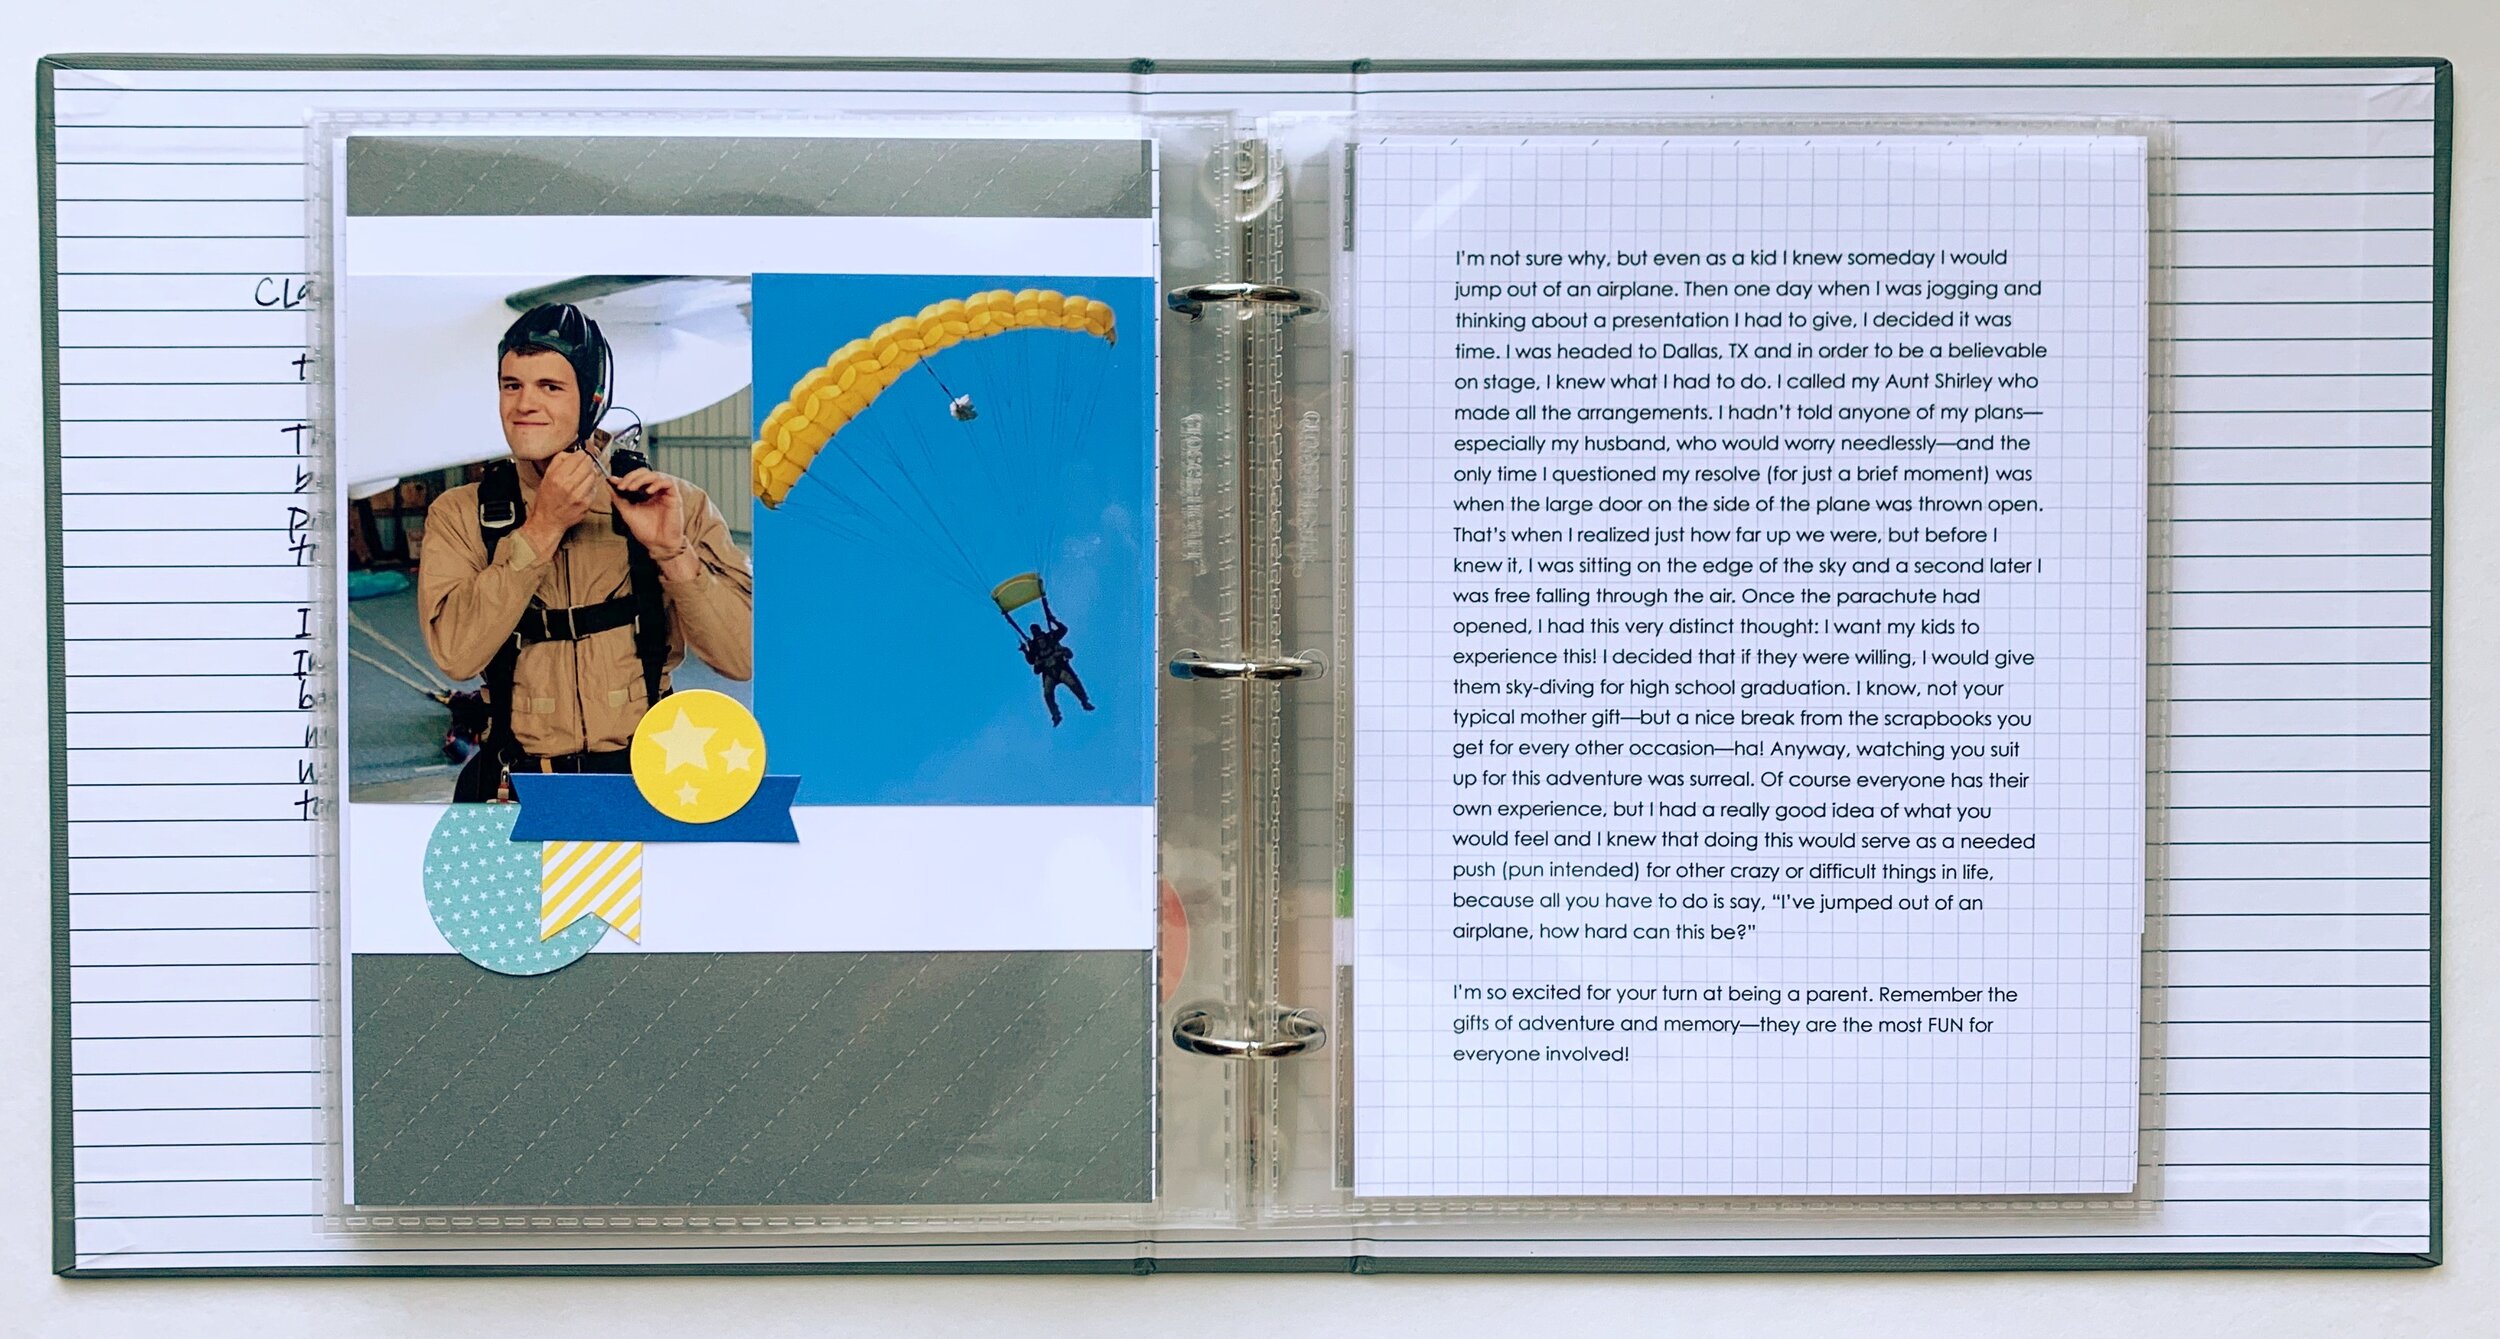
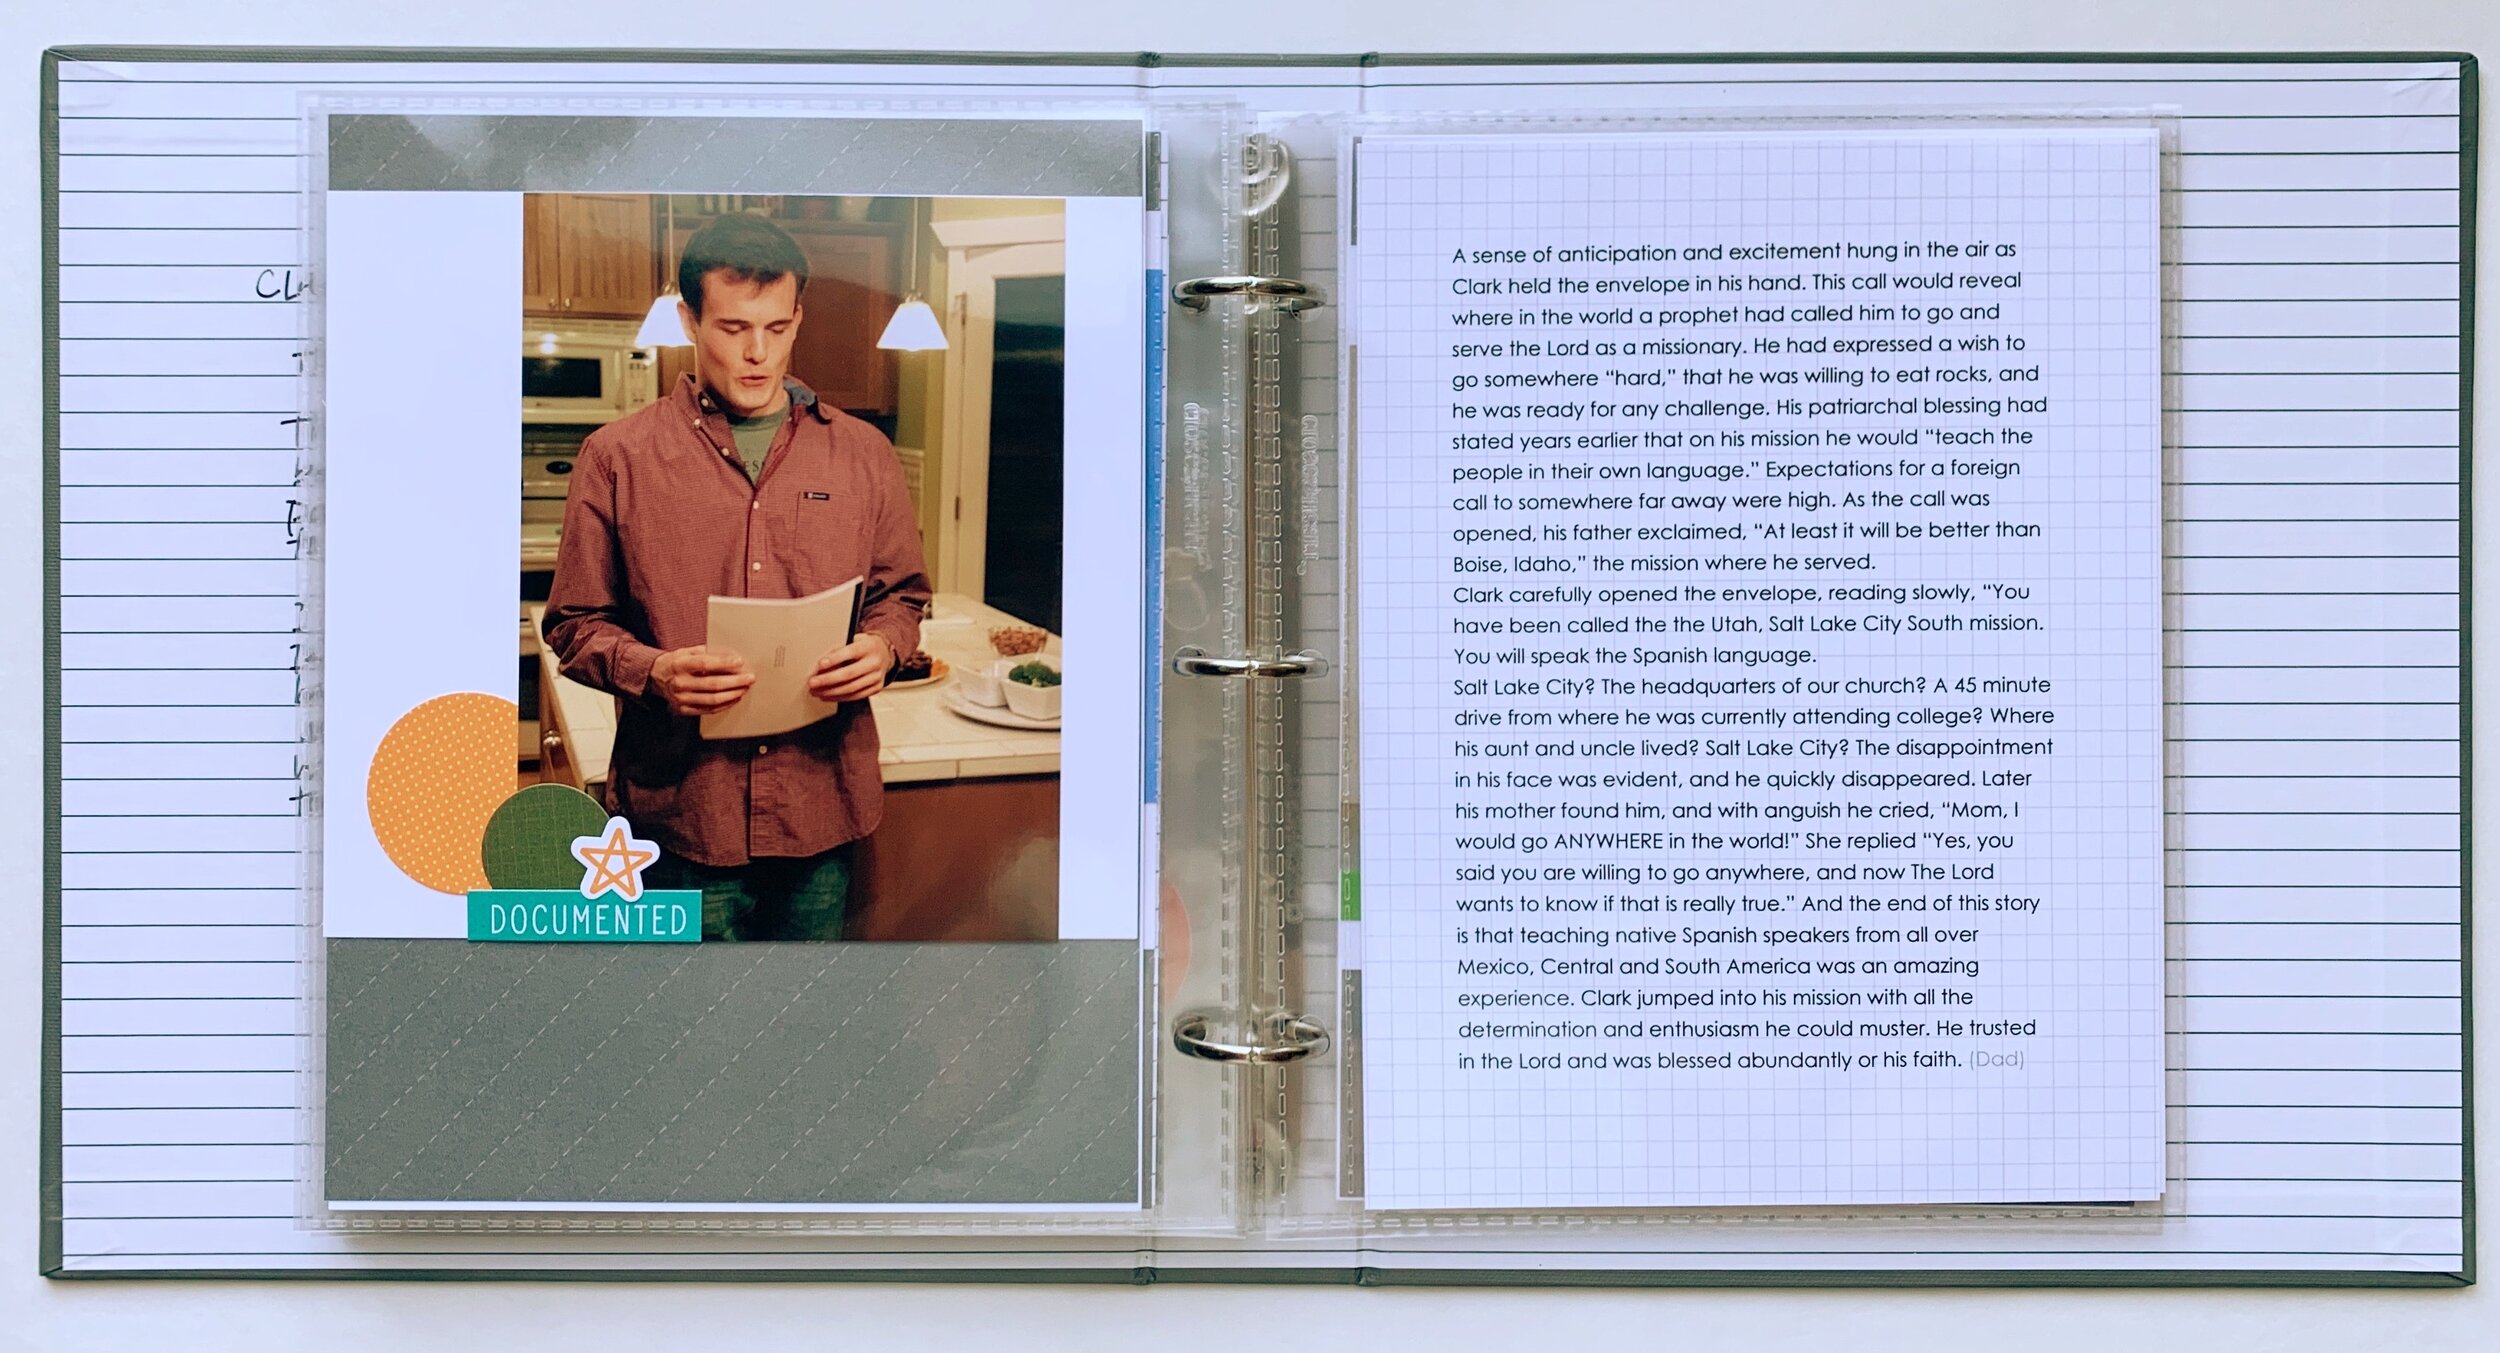
The basic concept is pictures + words, side by side in an album.
Think about it. Scrapbooking in it’s most essential form—and, it really can be this SIMPLE!
Here’s your Step-by-Step
Start with a smaller album—I recommend 6x8 or 8x8
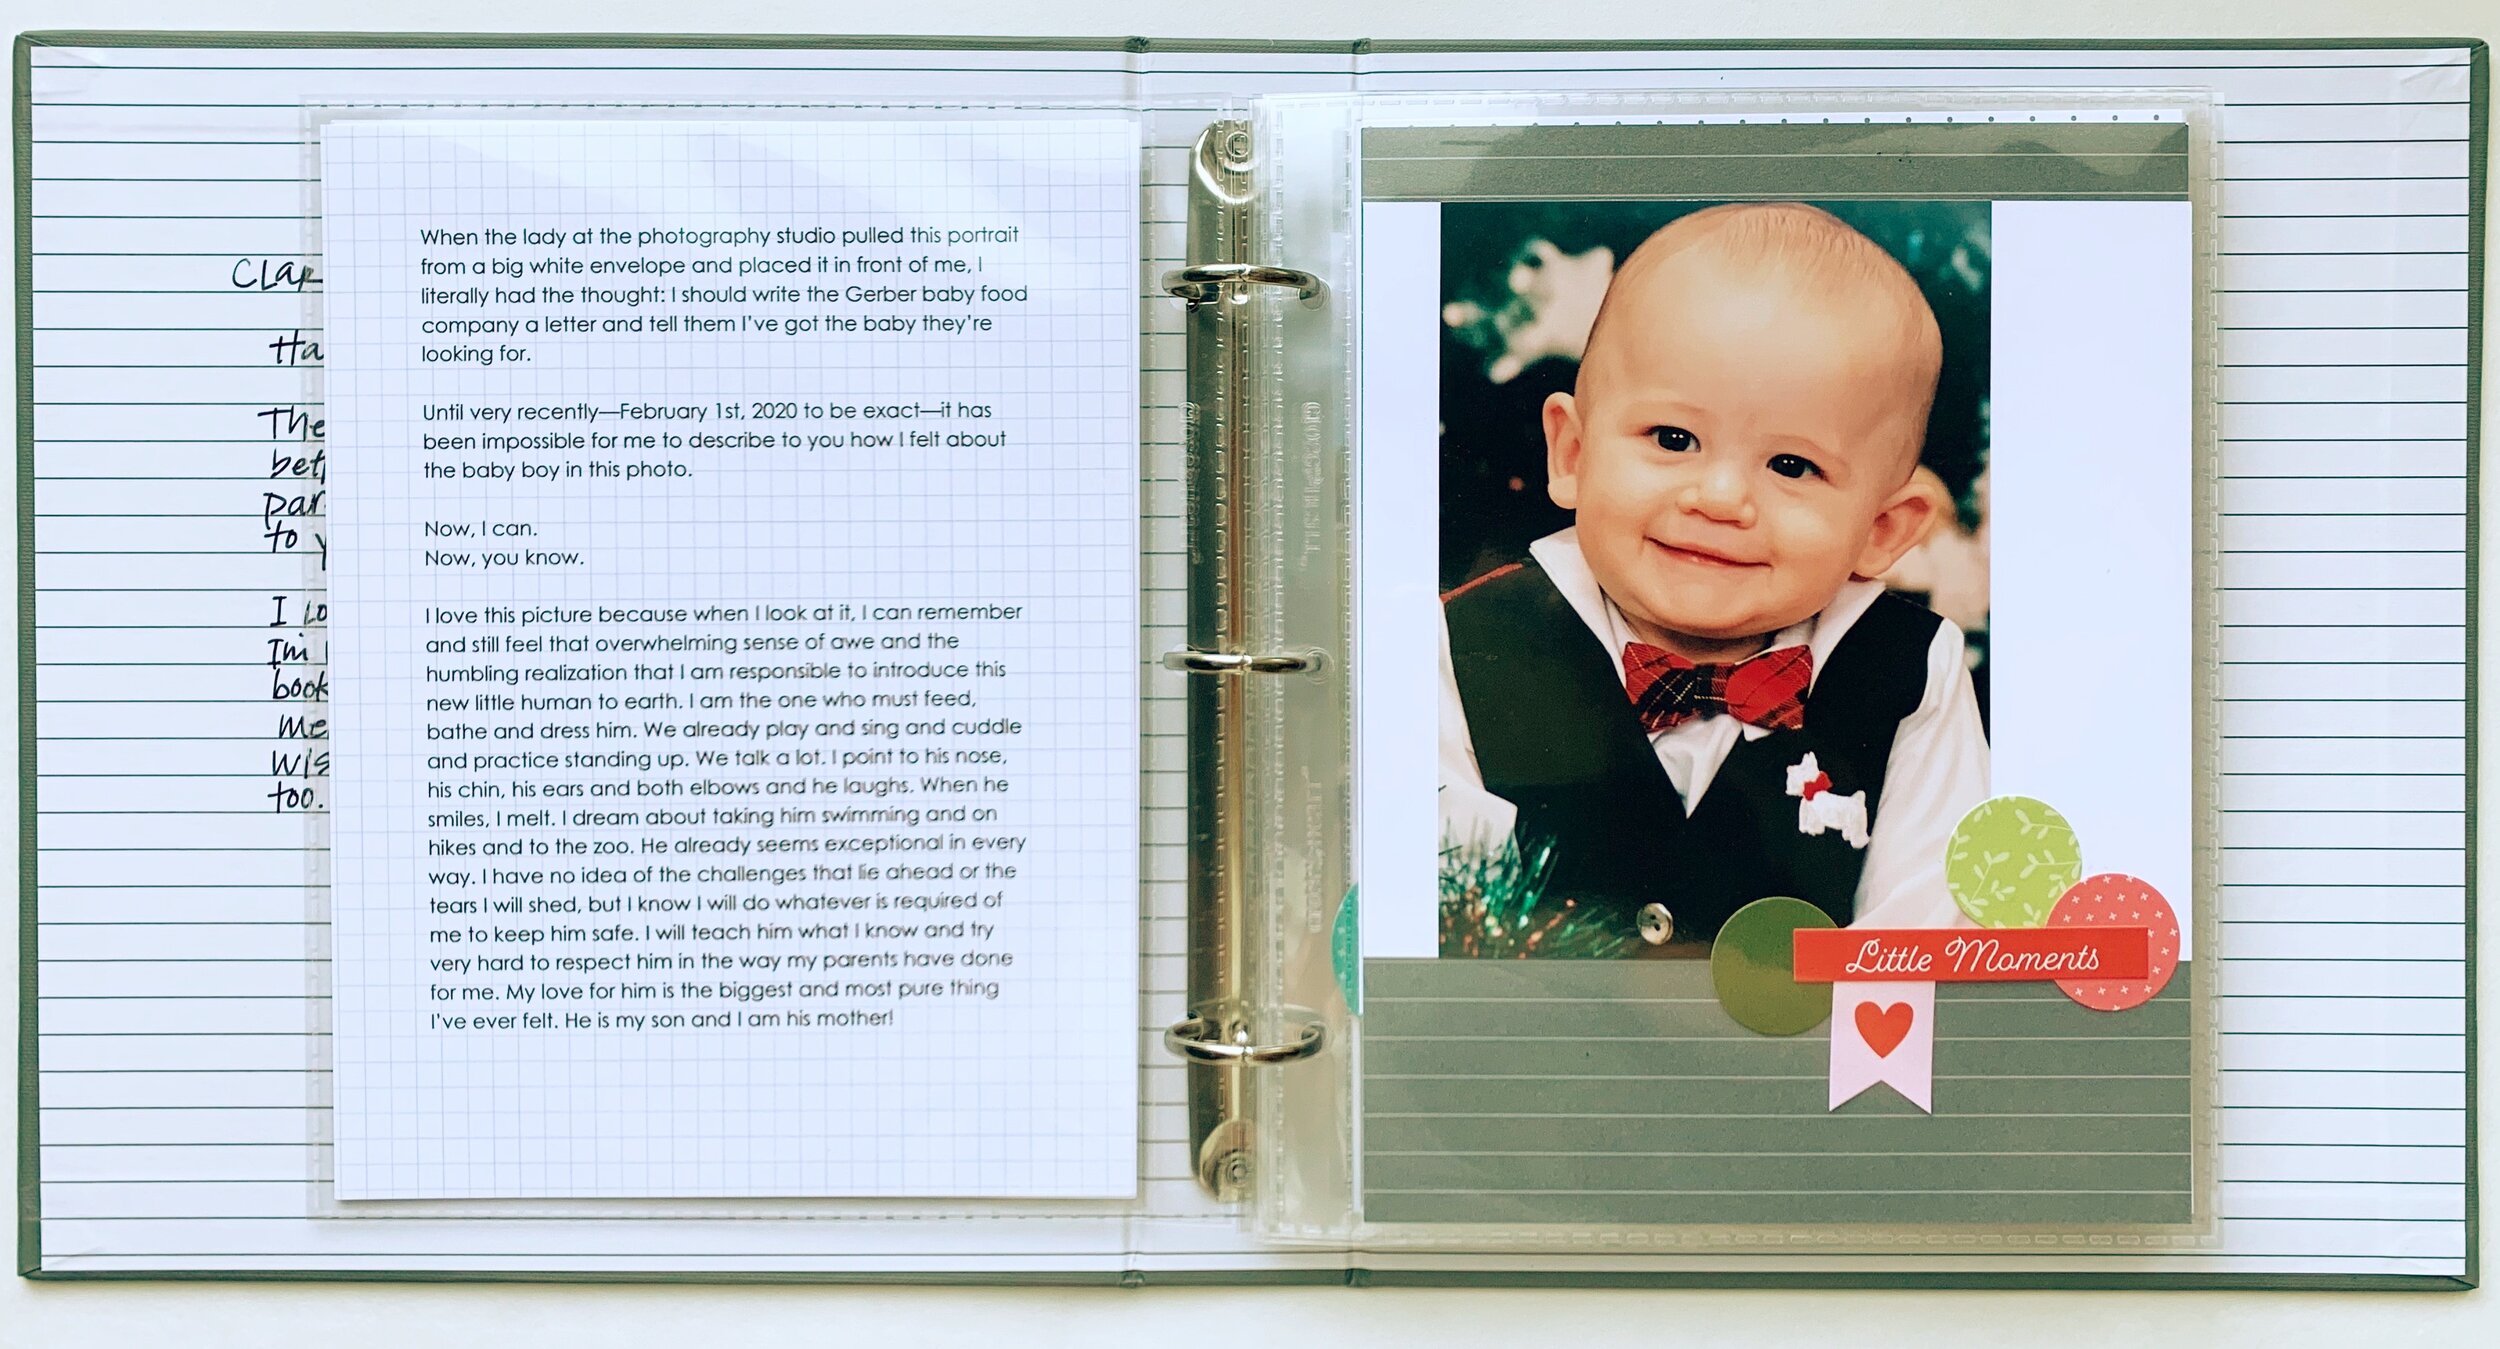
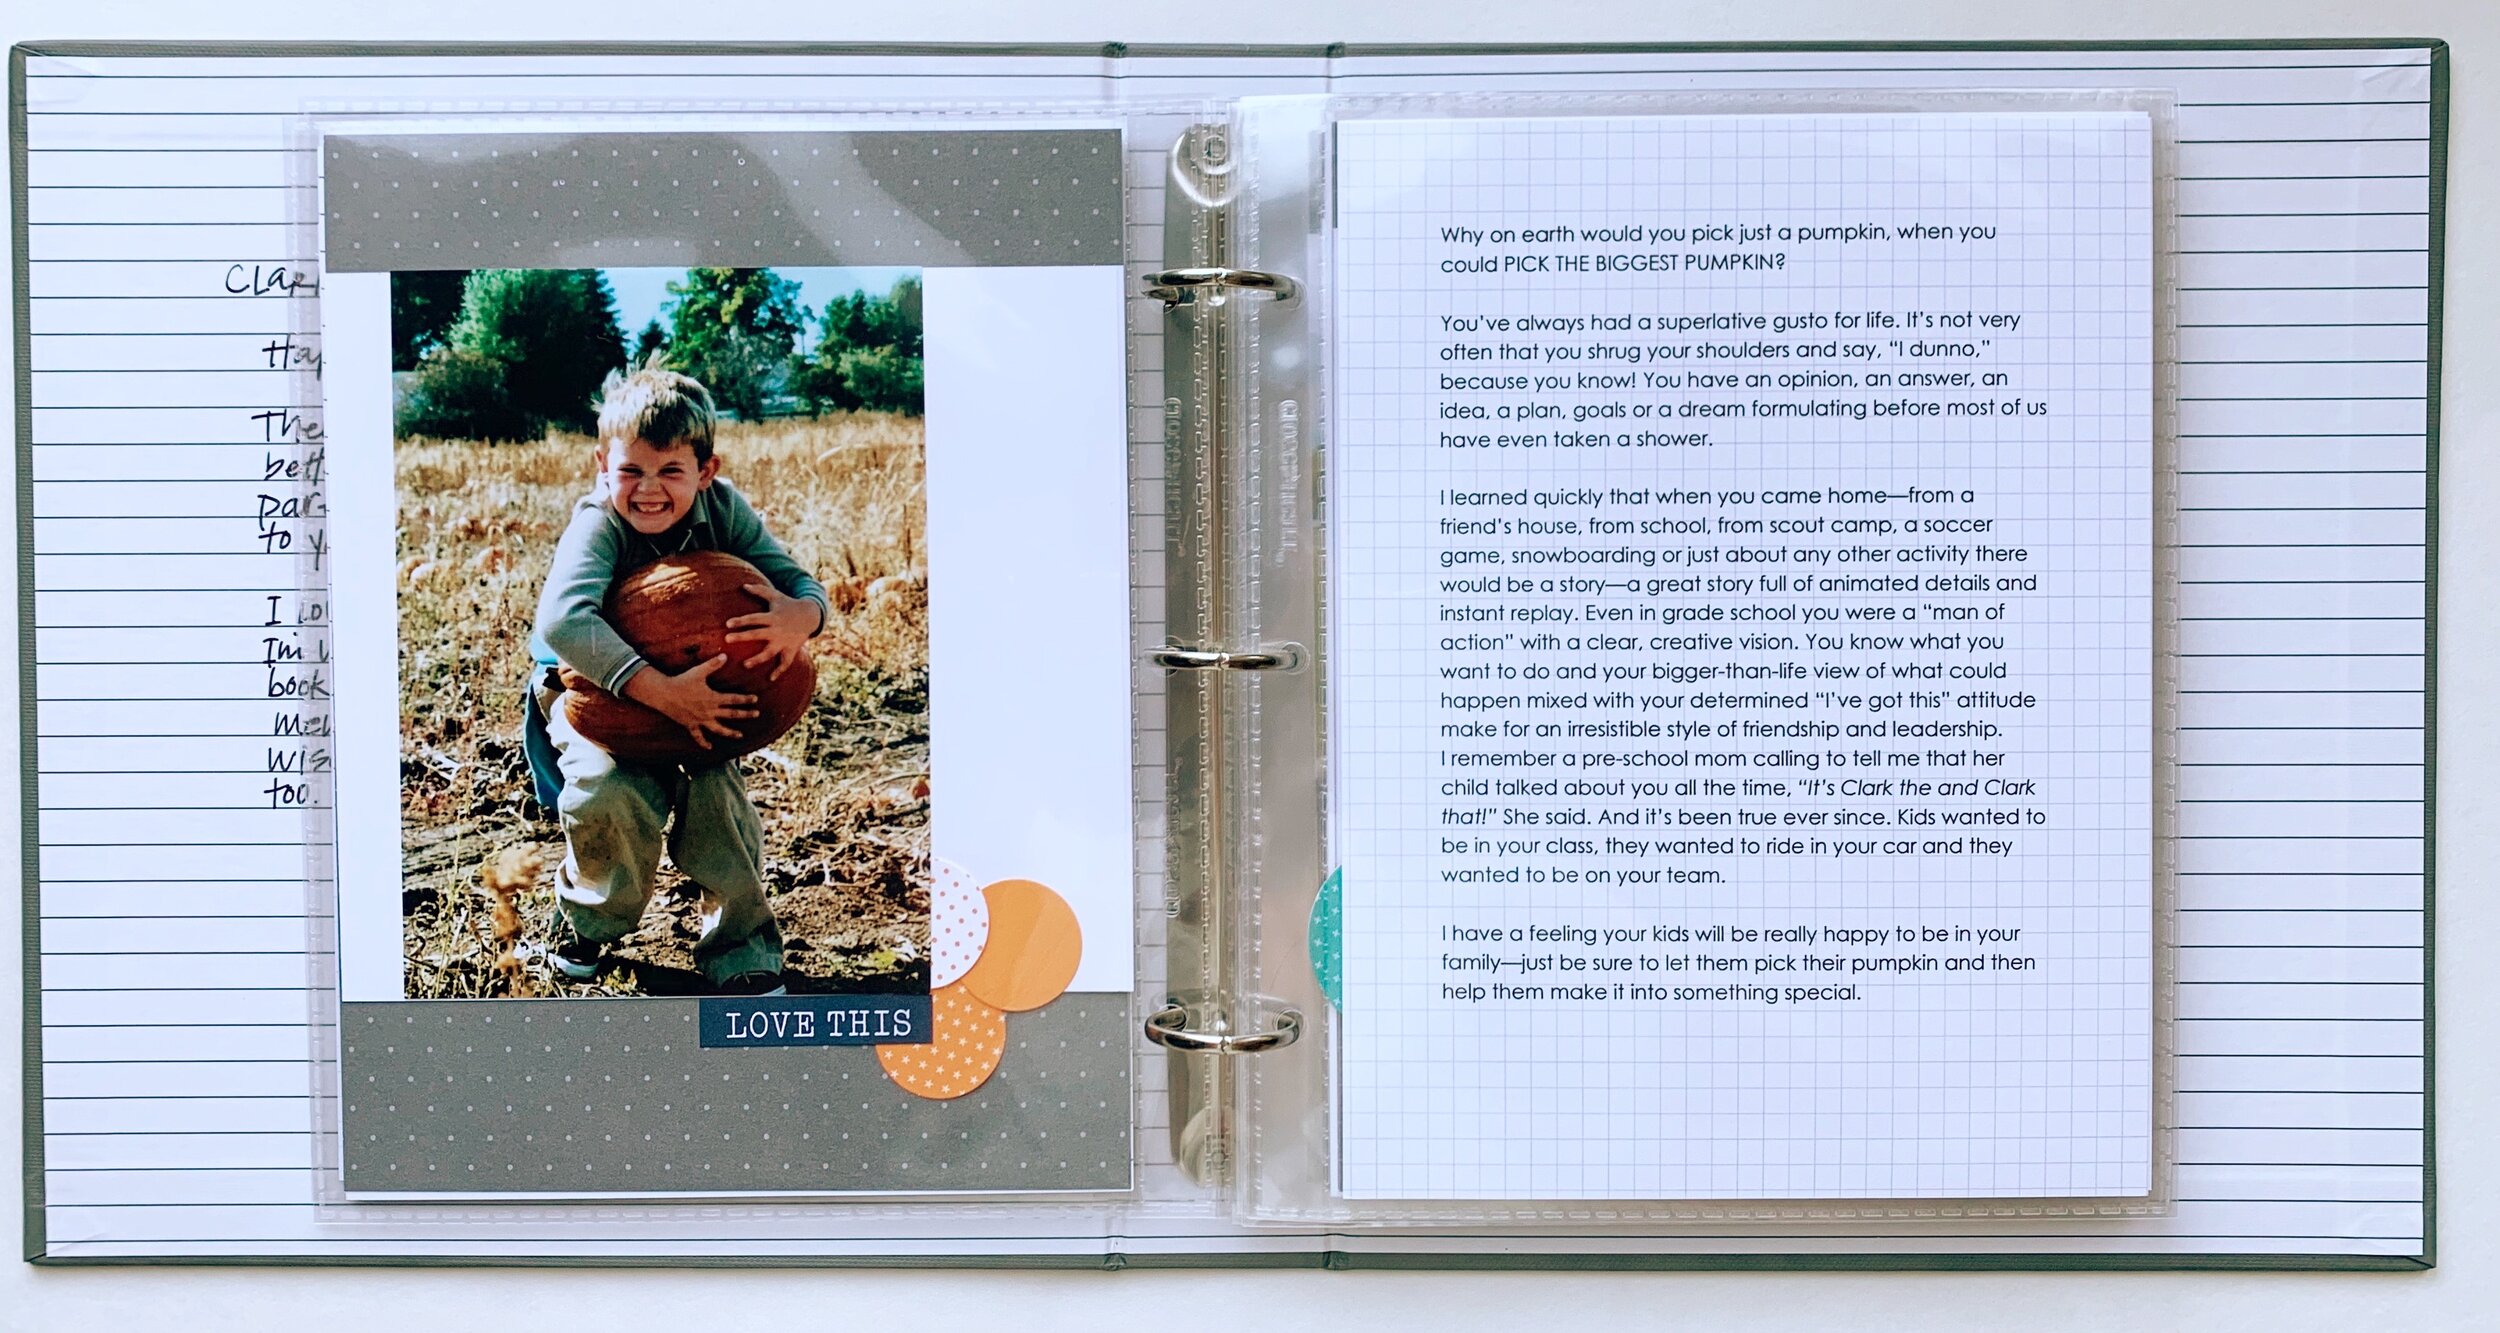
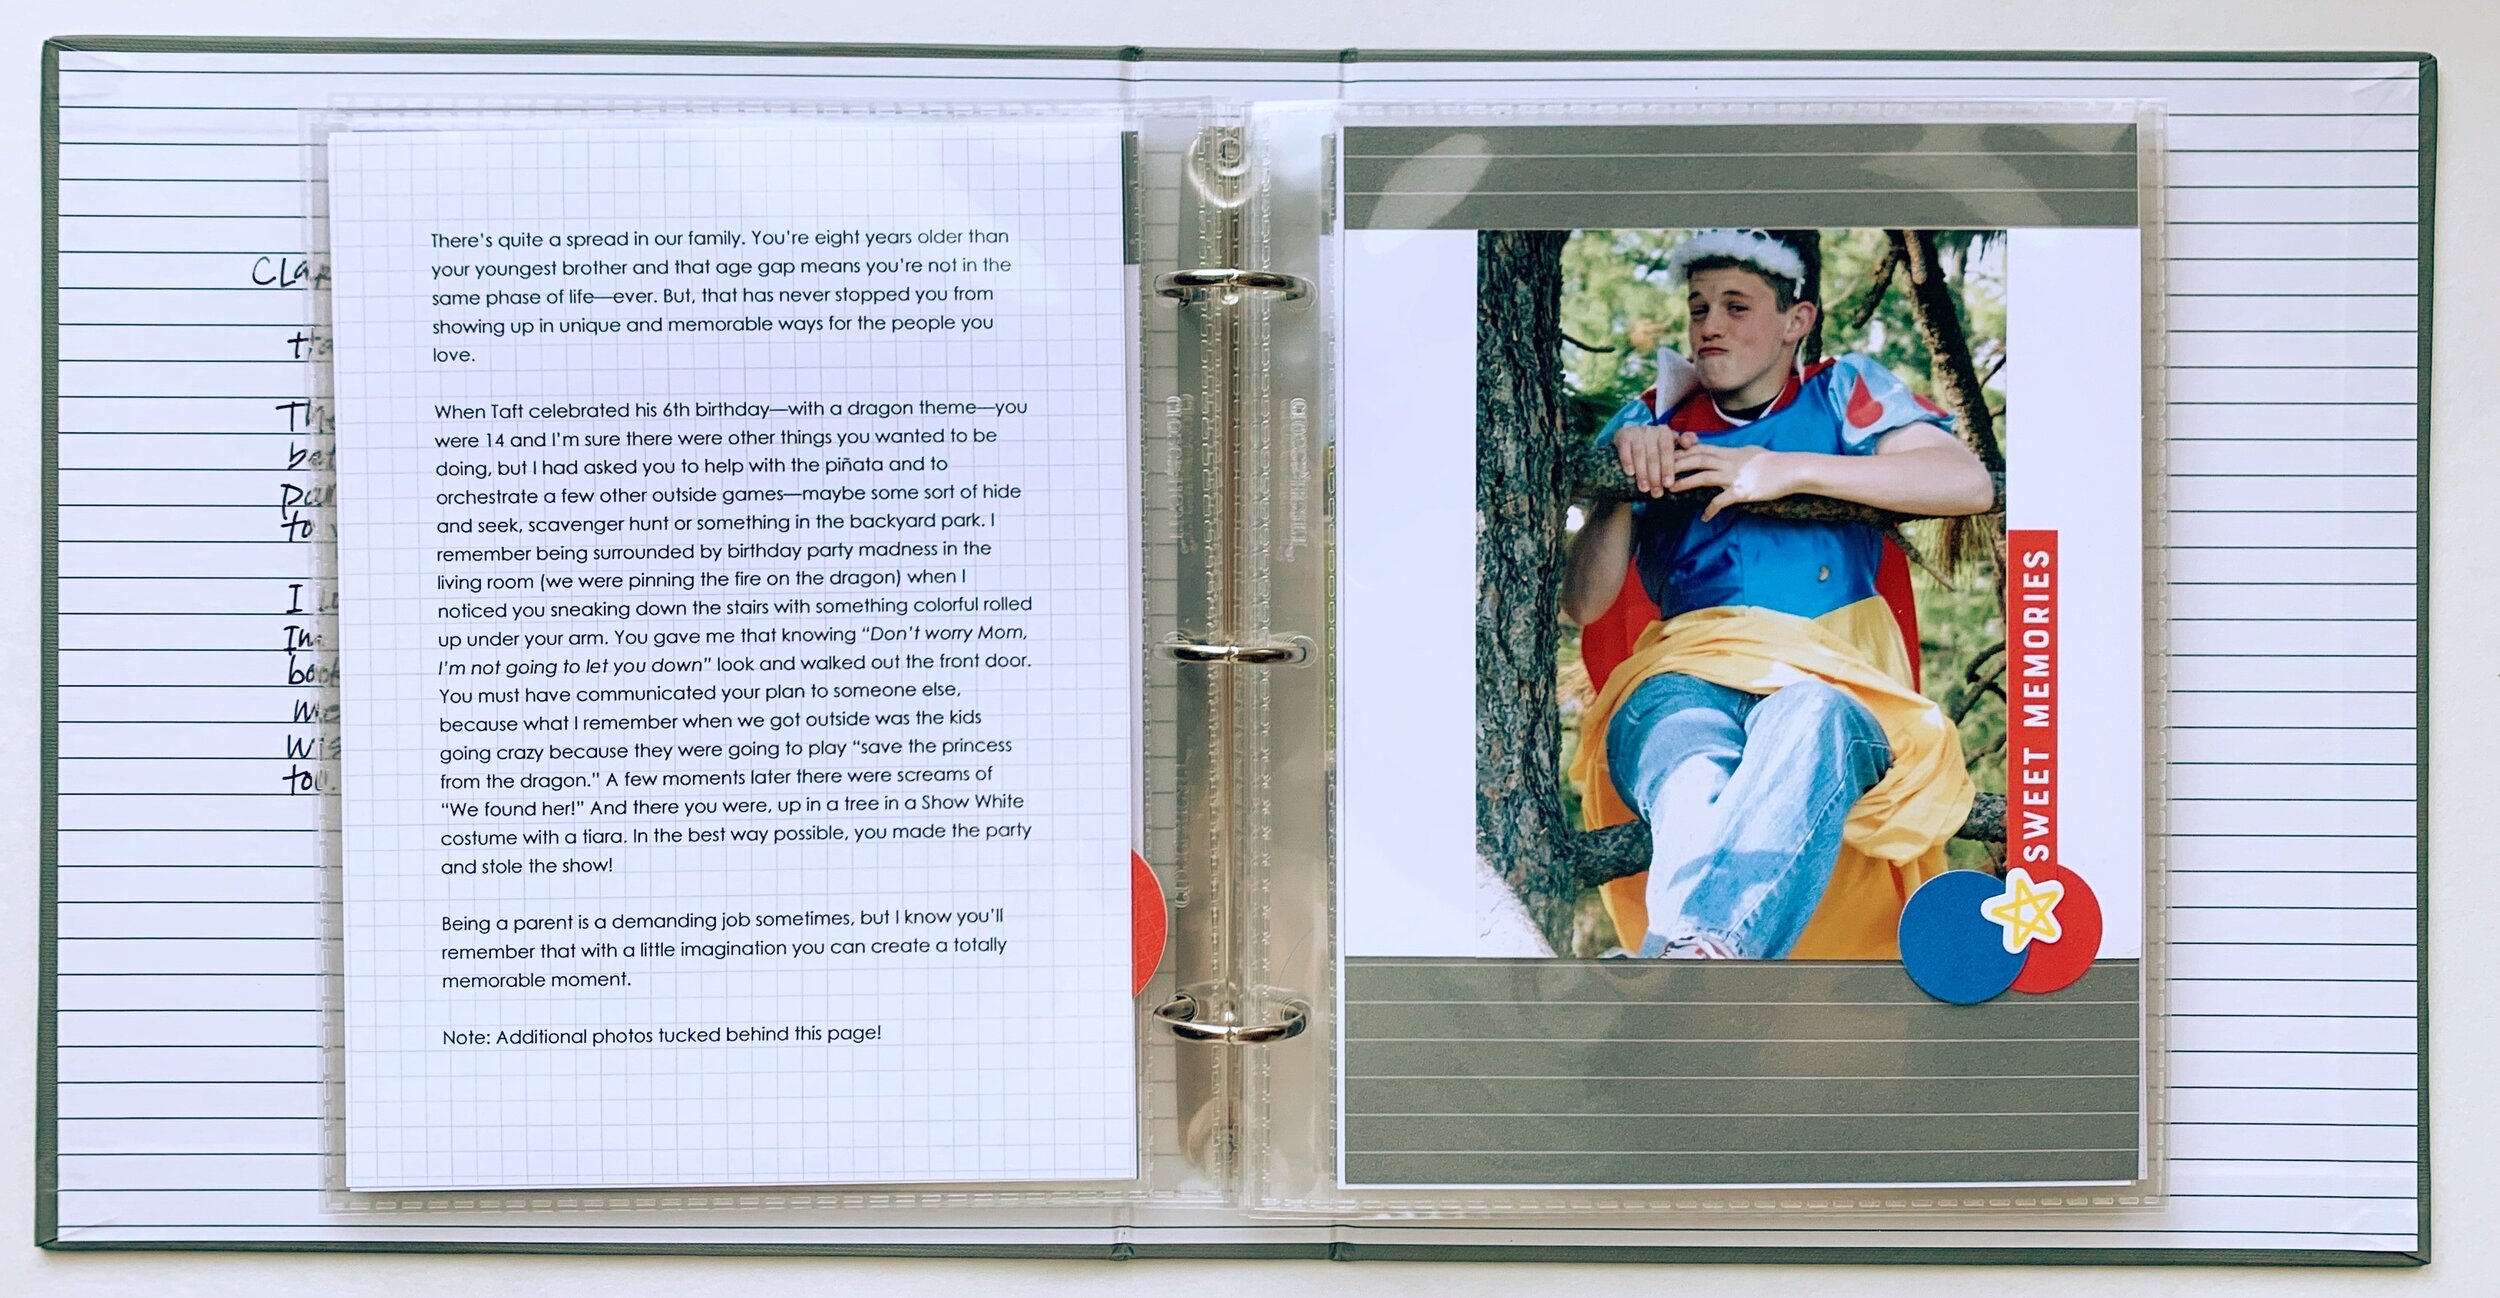
Gather 8 to 12 photos that represent pivotal moments or ready stories.
Place one photo with a few accents—non-essential but fun—on one side of each spread in your book. I like to assemble all of my picture pages first.
Sit down at your computer and write the memories (thoughts and feelings and specific details) that come to mind when you look at each picture. I do this writing in 15 to 20 minute chunks of time. You can also handwrite each memory—if that is easier for you.
Print these story pages.
Slip your completed picture and story pages in your album.
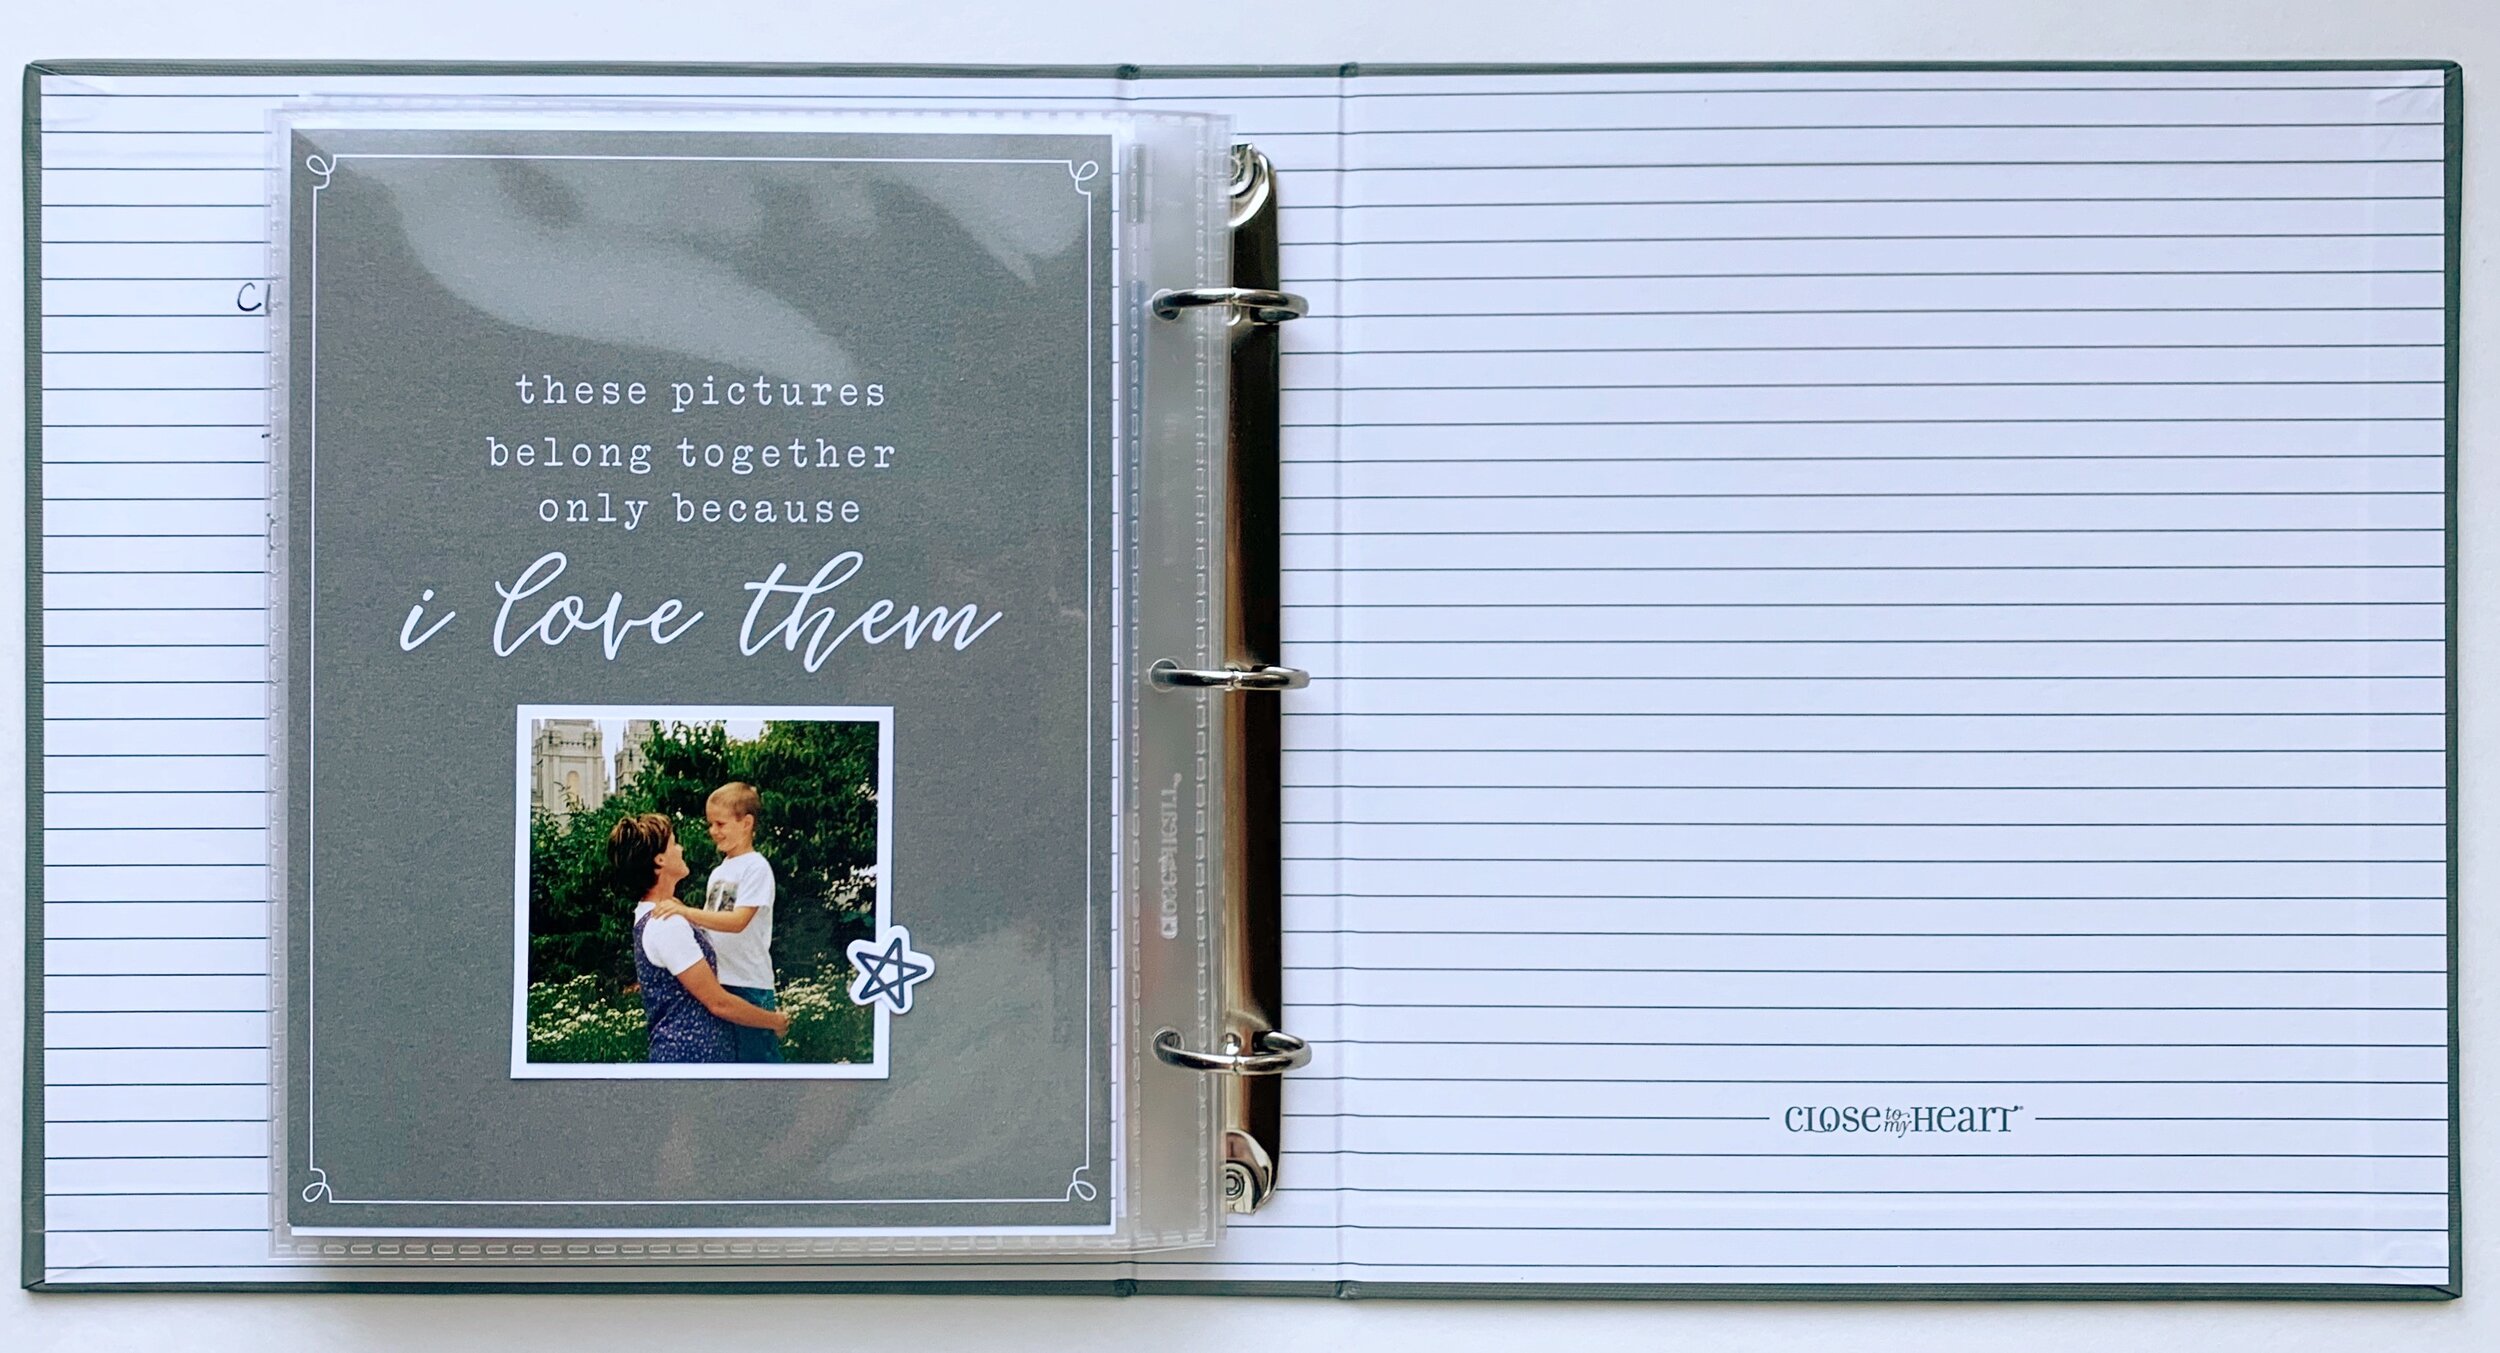
As an option you can add a title and closing page.
That’s it. I promise it does NOT need to be more complicated than this. Just imagine if you had one book like this that documented a handful of your grandmother’s photos in her own words. What a treasure that would be.
YOU can do this. I will help!
I’ve re-opened my 20in20 class—only thru July 3rd (at midnight PST)—and one of the projects slated for this fall is a Stories I Love album.
You can learn more and REGISTER HERE.

OR, do this project on your own, using my Stories I Love kit.
I am so proud of this kit. I love the quality and the touches of color and the versatility of pre-printed pages—you can use the white or gray sides.
This kit includes a a beautiful, linen 6x8 album with lined inside cover (so cool), pre-printed insert pages, photo mats, stickers and memory protectors.
THIS is truly is my favorite kit.
What would be the topic of your first Stories I Love album?